

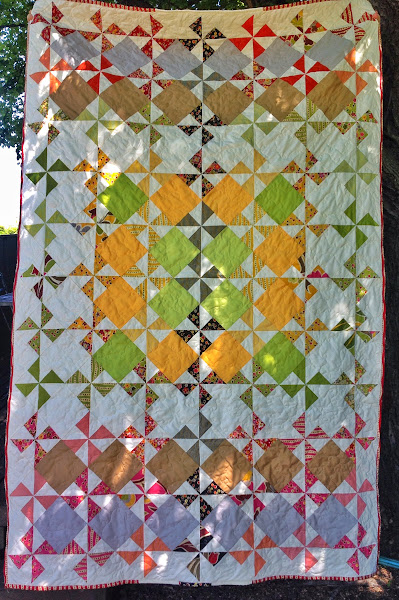
Approximate finished size
54 inches W x 84 inches H.
Binding type
Self binding quilt.
Fabric needs
The fabric colours, particulary the solid colours, have been selected to match the charm squares colour scheme. Select solid colours to match your charm pack colours.
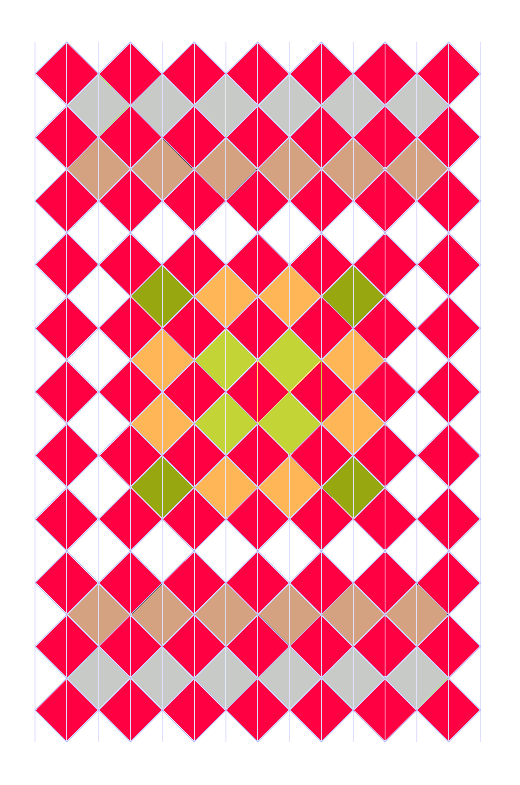
Quilt top
The quilt top is made out of 7 x 11 rows of squares/pinwheels and insert solid 6 inch squares distributed as:
- 77 pinwheel blocks (77 x 5 inch charm squares + 77 contrasting 5 inch fabric squares)
- 6 inch squares (see note below)
- 12 gray
- 12 light brown
- 8 occre
- 4 light green
- 4 darker green
- 20 cream
- Side triangles:
- 16 x 6 ⅞ inch squares cut in the diagonal to obtain 32 half squares
- 2 x 5 ⅛ inch squares cut in the diagonal to obtain 4 half squares
Note: The pinwheel block should be 6 inch square though my blocks turn out usually slightly smaller. This one is about 5 7/8. Therefore I recommend that before you cut the insert solid squares, you measure your pinwheel blocks and cut your insert squares accordingly the same size.
Back of quilt
- 2 pieces of fabric each 86 inch x 20 1/2 inch in a matching fabric
- 9 x 5 in squares in white
- 9 x 5 in squares in printed fabric
- 2 strips of white fabric each 86in x6in
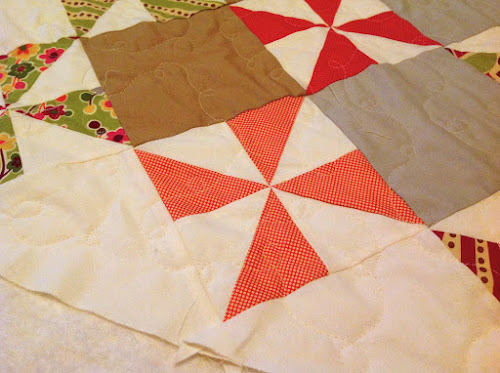
Pinwheel block
Each block is made with two 5 inch squares.
The finished block should be 6 inch square.
How to make this block
Watch a 2 minute pinwheel block video tutorial:
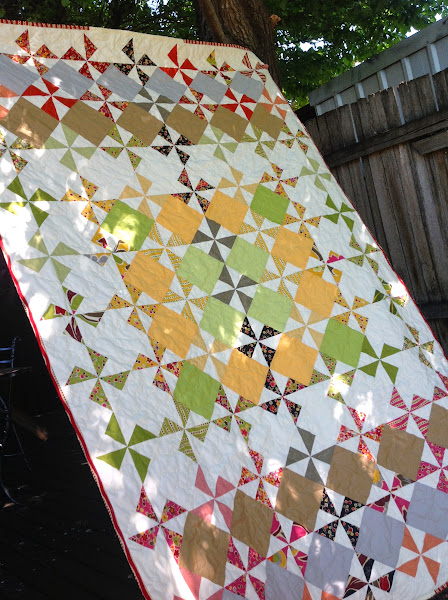
Quilt top layout
The quilt blocks are set on point.
Arrange quilt as per layout below with one row of pinwheels blocks alternating with a row of solid fabric.
If you are using charm packs, place the pinwheel blocks combining colours as you can see in the photograph below.
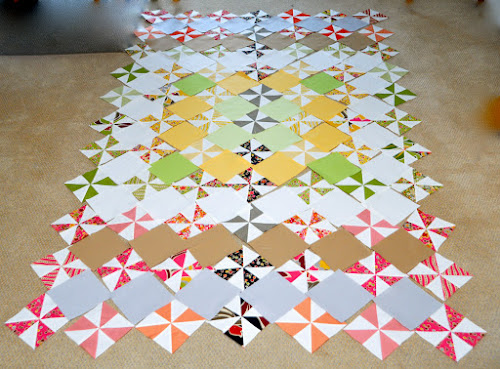
Once you’re happy with the placement, start stitching on the diagonal, starting for instance with the bottom right corner block. Attach a corner triangle and 2 side triangles to the block.
Then proceed to the next row starting with a side triangle, a pinwheel block, a solid square, another pinwheel block and a side block.
And so on.

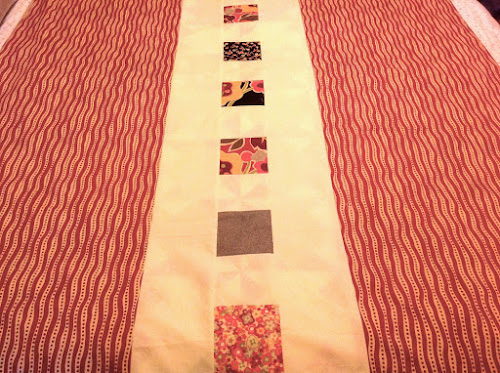
Back of quilt assembly
This is the back of the quilt.
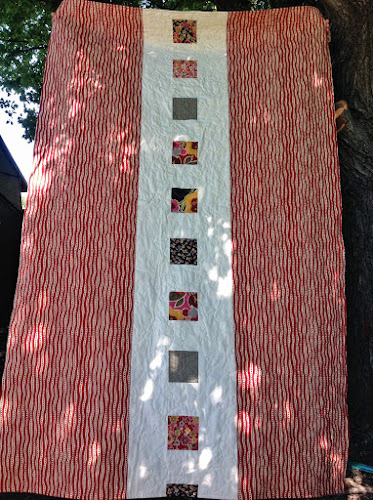
Start assembling the back of the quilt through a middle row of 5 in charm squares alternating in white and contrasting colours.
Then stitch a long strip 86 inch x 6 inch to each side of the charm square row.
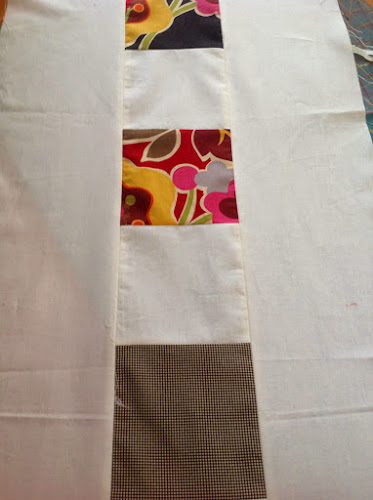
And finally attach the 20 1/2 inch x 86 inch pieces to each side.
This is the back of the quilt.
Quilting
I´m not going to give directions to the quilting. There´re plenty of tutorials out there. I chose to quilt mine using free motion.
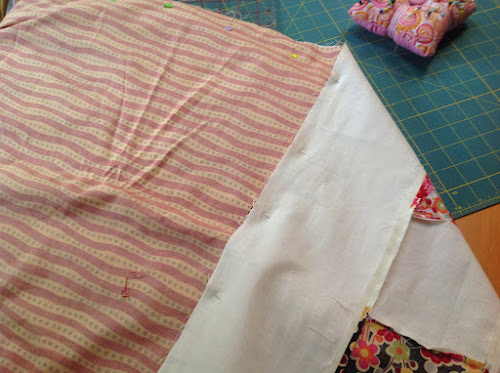
Self binding
The quilt backing is large enough to self bind.
Learn how to self bind a quilt in less than 2 minutes.
Done!
I don´t know if I prefer the front or the back of this quilt.


Well done!! I never thought I would be interested in making a pinwheel quilt but you have proved me wrong. I can imagine using fussy-cut pieces for some of the solid diamonds or perhaps fabric-printed photos of the cats who have shared my bed. Thanks for sharing.
LikeLiked by 1 person
Thank you kitblue! I can see fussy-cut pieces would really work for the solid squares. You’re now inspiring ME!
LikeLike
How do you deal with the corners on the self binding?
LikeLiked by 1 person
Hi Emily, I’ve added some extra instructions for how to deal with the corner of the self binding.
LikeLike
Thanks for a great tutorial and for your generosity in sharing. I’m going to be helping with a charity project making quilts for refugees coming to the UK so this will be an interesting pattern for me whilst going together quite easily. Thanks again 🙂
LikeLiked by 1 person
All the best with your project Nik!
LikeLike
Thanks for the tutorial. It’s a mighty pretty quilt.
LikeLiked by 1 person
Thank you for the instructive tutorials and videos. I am so glad to have found your page and your blog. I love that.
LikeLiked by 1 person
I hope you enjoy my tutorials
LikeLike