
Detail of puff gathering

This block requires hand sewing.
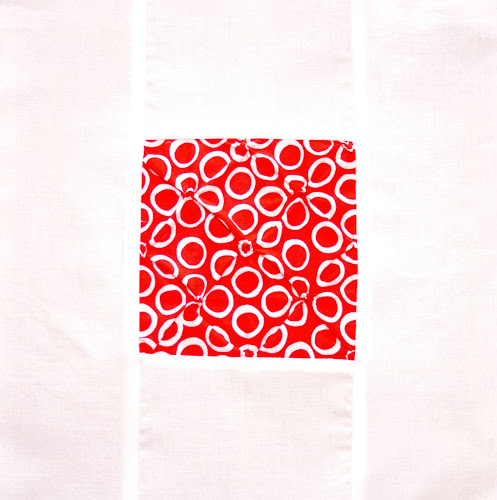
Block type: log cabin
Block size: 11 inches
Colour scheme: reds and neutrals
Texture/fabric manipulation: puff gathering
Quilt size: The finished quilt is 52 ½ x 52 ½.
Needs:
- one 7in x 7 in rectangle in red tones for the textured centre square
- two 5 in x 3 1/2 in rectangles and two 11 in x 3 1/2 in rectangles for the border
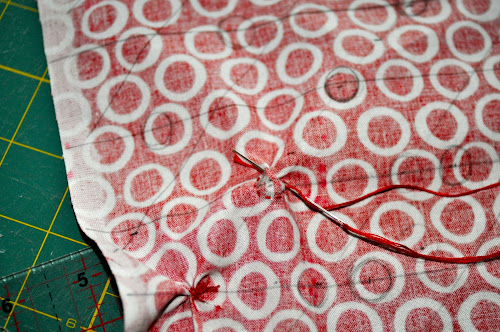
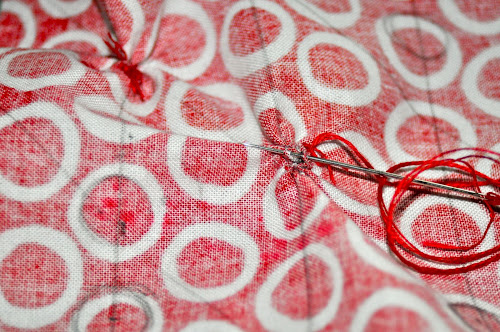
When you end stitching around, pull the thread to gather the fabric making sure a puff is created on the other side.

If necessary, hold the puff from the other side as you pull the thread.

Finish with a double knot to ensure the thread doesn’t slip.
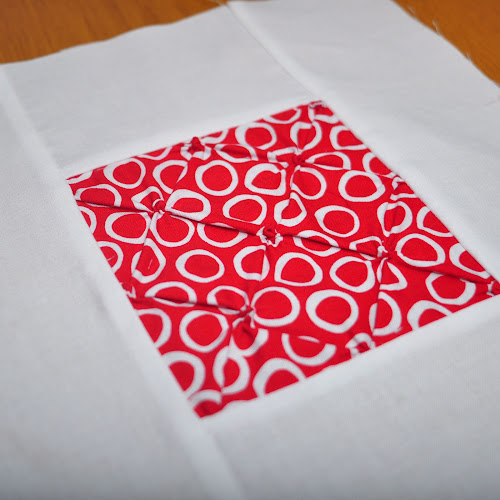
When you have done all the puffs it’s time to stretch (not press) the square.

If possible pin your square to the ironing board stretching the texture.

Now, put the iron on the steaming setting and place it on top of the fabric without touching. The humidity and heat will be enough to help flatten the square.

Let it dry. When dried remove it from the ironing board.

Trim the square to 5 inches.

Now stitch the border to the centre square.

The block is done.

Variation for this block
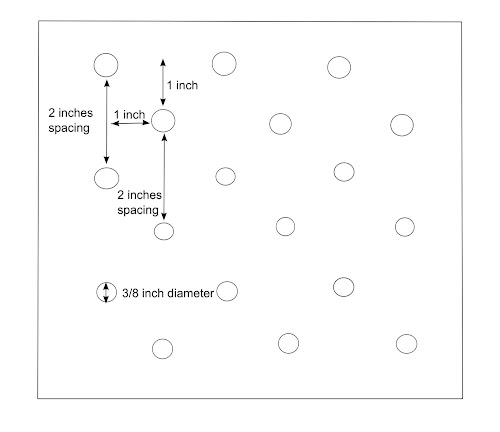
If you have a nice geometric print, you could use the pattern to guide you make the grid for the texture as I did (see picture).

I used the pattern to stitch the puffs at regular intervals using the flowers as guides and stitching every two flowers. Polka dots or gingham would work well too.

Textured blocks tutorials
This is the 12th block in a series of 25 exploring texture in fabric.
Each block is made out of a centre 5 inch square featuring some fabric texture such as pin tucks, smocking, shirring and the like. Then a 3 1/2 wide border encloses each centre square.
The colour scheme is red and white/cream alternating reds and white/cream for the centre square and border.
Some of the textures show better on plain colours than on heavily patterned fabric.
See all Textured quilt sampler tutorials for this quilt.
Share your pictures
Are you making this quilt? Share your pictures on Flickr’s TeresaDownUnder group.

Oh my goodness!! You’re my new favorite site! I’m a school teacher, and I’ve been teaching a quilting elective for my 6th graders the past several years. You’re sampler is going to give me wonderful new stuff to try! THANK YOU!!!!
LikeLike
Fantastic Lisa! I’d like to see what your students make. You can share pictures at the quilt flickr group http://www.flickr.com/groups/2086081@N20/pool/
LikeLike