
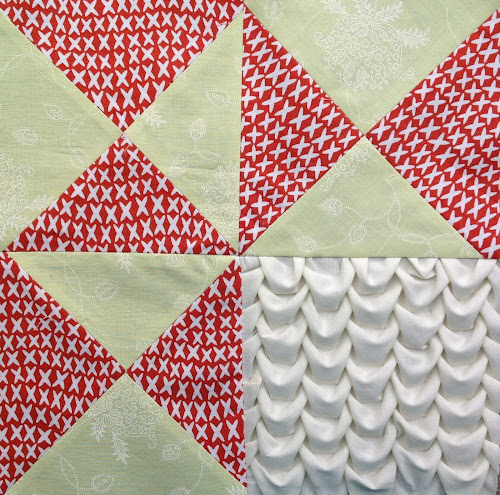
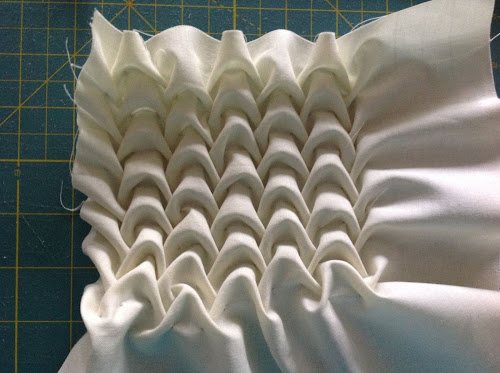
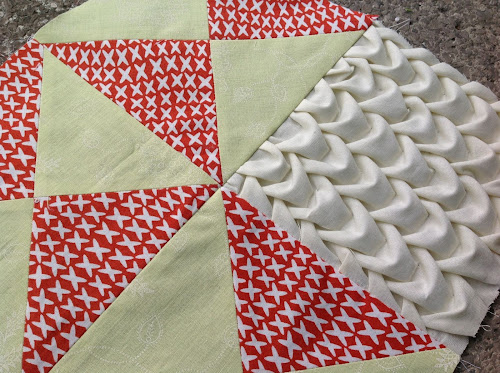
Close up

Block type: 4-patch
Block size: 10 1/2 inches
Colour scheme: reds, greens and neutrals
Texture/fabric manipulation: Canadian smocking
Cut:
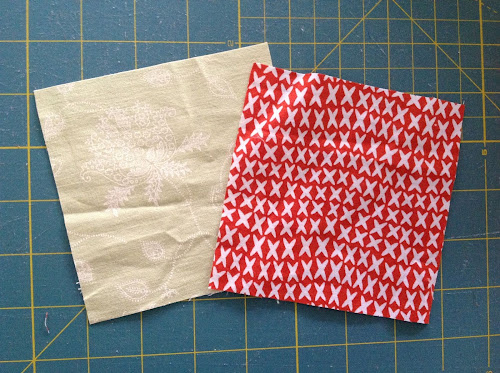
- one 6 1/4 in red square
- one 6 1/4 in pale green square
- one 4 1/2 in red square
- one 4 1/2 in pale green square
- one 9 in cream square
Making the shell smocking
Learn how to make shell smocking in less than 3 minutes:
Shell stitching diagram
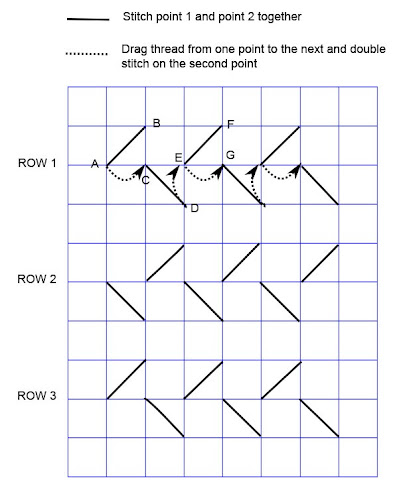
As you can see in the diagram, shell smocking is stitched in rows.
The black line implies that both points, A and B, C and D, E and F, etc are pulled and stitched together.
The dotted line implies that you drag your thread from the last pulled stitch to the next stitching point, without pulling. Then you need to double stitch on the next stitching point to act as an anchor for the next pulled stitches. All rows are stitched in the same way as illustrated in row 1.
If this is not clear, keep reading below.
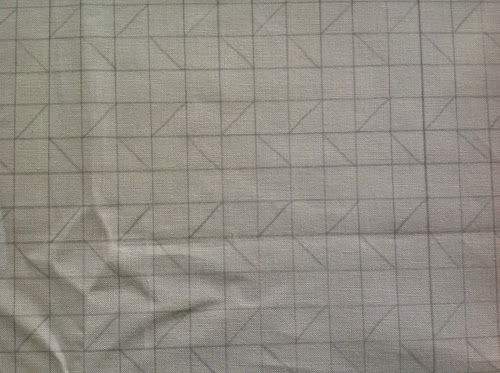
Get the 9 in fabric square and draw a grid with lines at 1/2 in intervals. Then draw the diagonal lines as per photo below.
Double stitch on the first dot, then pick up the next dot.
Pull together and stitch. This is A and B pulled together.
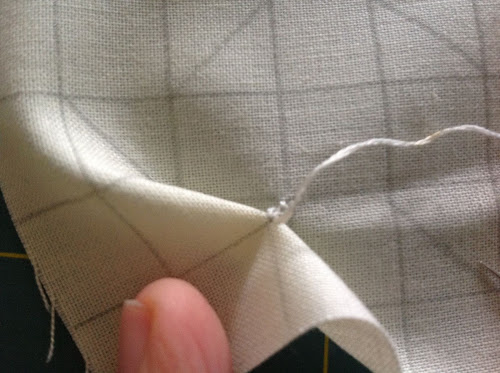
Now move the thread to B and stitch without pulling.
Double stitch to anchor the thread on C.
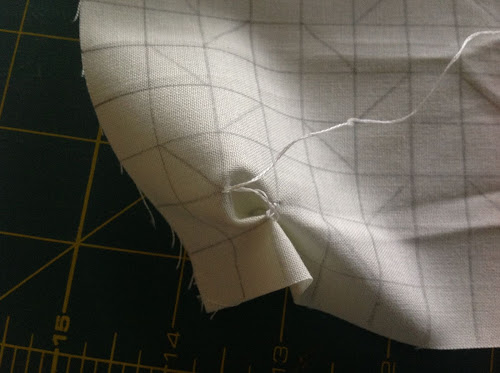
Repeat the previous steps with C and D, and so on.
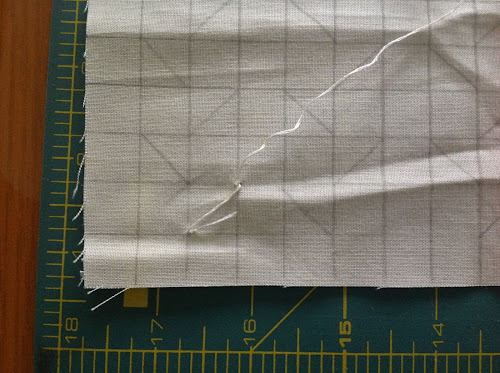
At the end of Row 1 you will have something like this.
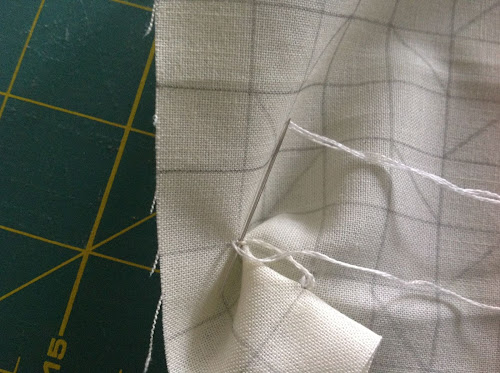
Continue with Row 2 in the same way as row 1, and so on.
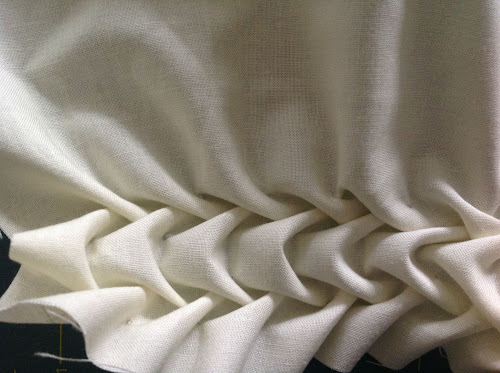
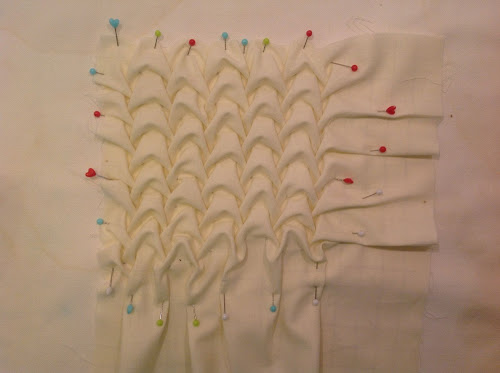
Now stretch your smocking on a padded table as per picture below.
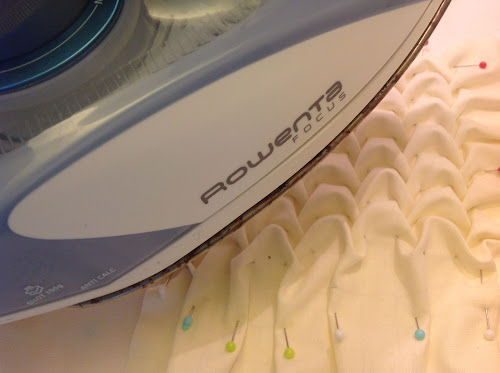
Use the steam from your iron to set the smocking. Place you iron close to the smocking with the steam setting on and hoover over the piece. Let the piece get dry and cold.
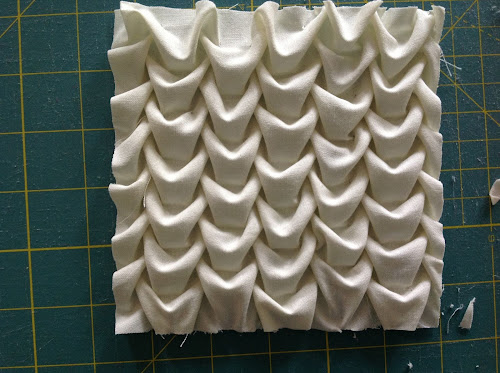
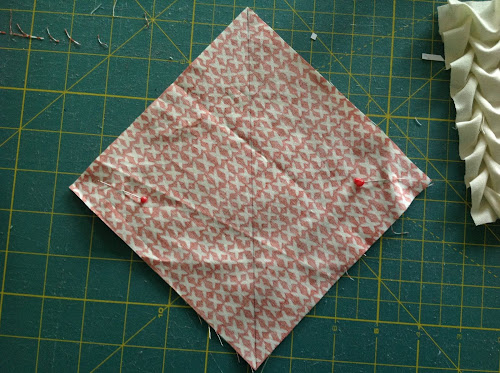
Then trim the piece to 5 1/2 inches.
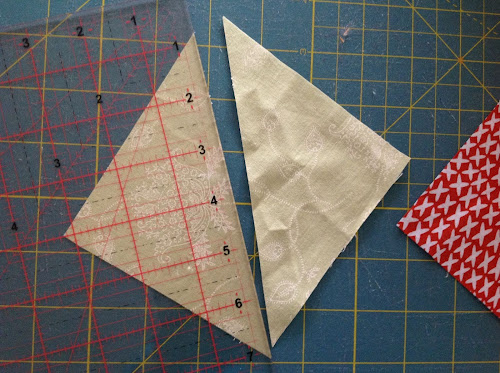
Now get the red and greem 6 1/4 in squares and place them with right side facing together. Trade a diagonal and pin.
Stitch on each side of the diagonal using a 1/4 in seam allowance.
Cut through the diagonal line. You will obtain two squares.
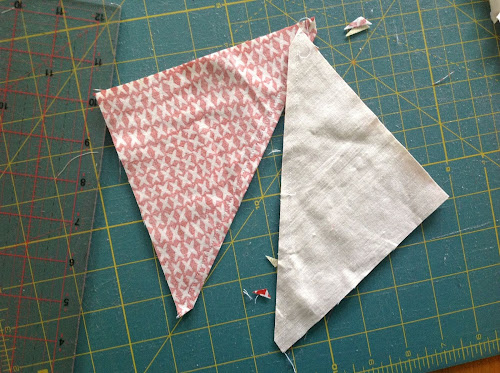
Then press open.
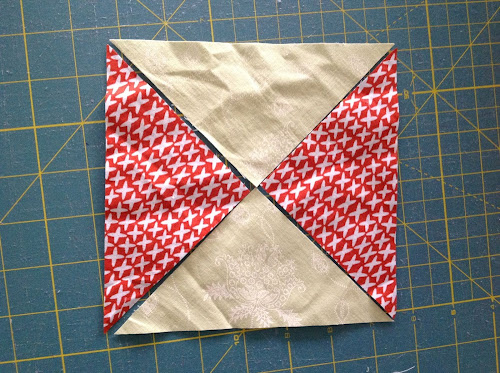
Now cut the squares through the diagonal again. You will obtain the four pieces below.
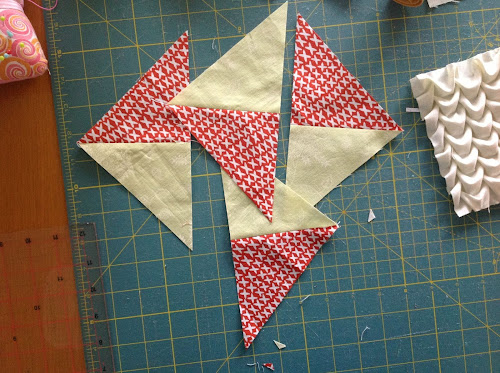
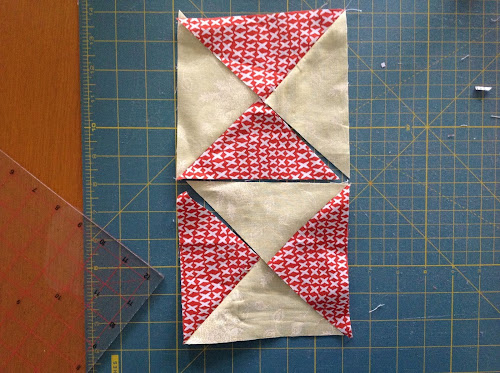
Place as per picture and stitch together to obtain 2 squares again.
Now cut two 4 1/2 in squares, one red one green.
Cut each on the diagonal.
Arrange each as per picture below and stitch.
Place all squares as per picture below and piece together.
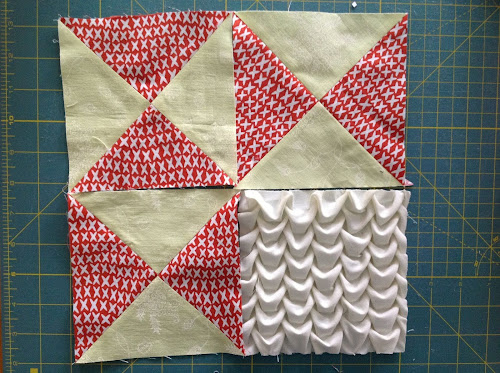
The block is finished. And it’s beautiful!
Textured 4-patch quilt tutorial
This quilt has 16 x 10 1/2 in blocks.
Each block is a 4-patch block in greens and reds. The fabric manipulation is made in a cream fabric.
See all Textured 4-patch quilt tutorials.
See also my first Textured quilt sampler tutorial.
Share your pictures
Are you making this quilt? Share your pictures on Flickr’s TeresaDownUnder group.

HI, im trying this but im having a terrible time. Could you be more specific on the hand sewing; for someone experienced its great, but its abit vague.
LikeLike
If you follow the grid instructions you should be right. There’re basically two actions. First you stitch together a and b. Then double stitch tightlly both points together and then you move to the next point as per diagram without pulling, just picking up the fabric and double stitching again to anchor the thread before pulling the next dot together.
Having said that you could just cut the thread every time after stitching a and b together and so on and then start on the next sewing point and pull both points together again, double stitch, cut your thread and up to the next two dots.
And you do this by rows, as per diagram. The pattern won’t come out until you do row 1 and 2. I hope this makes more sense.
LikeLike
You have very good instructions. I have some smocking experience and will give this a try. Next time would you use contrasting thread? With the thread the same color as the fabric it is difficult to see.
LikeLike
Thank you ValerIe. I didn’t want the thread to show through thats why I used white thread. I thought the diagram would show the process well enough. But it didn’t occur to me to use a contrasting thread. If I make any more smocking I’ll bear it in mind.
LikeLike
Do you have more submissions with different color/pattern combinations? Love the pattern How much fabric does it take?
LikeLike
Judith, you can see other textured blocks here https://mypatchwork.wordpress.com/category/textured-4-patch-quilt-tutorial/
LikeLike
I really need the second row of stitching on the smocking labeled. There are no instructions. Thanks!
LikeLiked by 1 person
Hi Jackie, the second and all subsequent rows are done in the same way as row 1
LikeLike
I cant do that either 😦 Can u make a video of it.
LikeLiked by 1 person
Hi, a shell smocking video is on my to do list actually! Stay tuned
LikeLike