
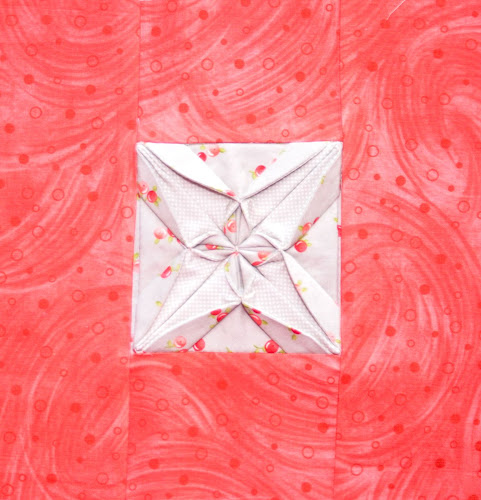
Closeup

Block type: log cabin
Block size: 11 inches
Colour scheme: reds and neutrals
Texture/fabric manipulation: fabric folding / fabric origami
Quilt size: The finished quilt is 52 1/2 x 52 1/2.
Needs:
- two 10 in x 10 in squares in contrasting neutral tones for the centre square.
- 5 1/2 square to appliqué the origami
- two 5 in x 3 1/2 in rectangles and two 11 in x 3 1/2 in rectangles for the border

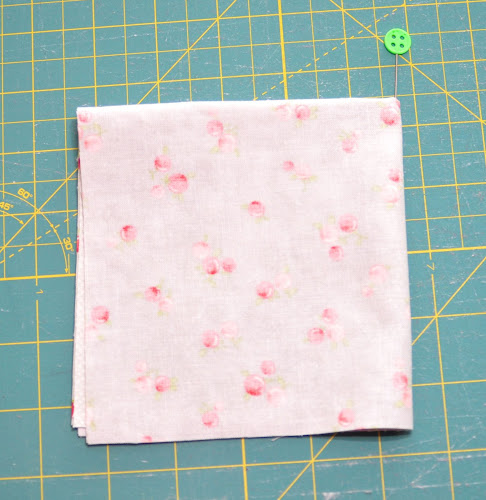
Fold twice into a square to find the centre and pin.
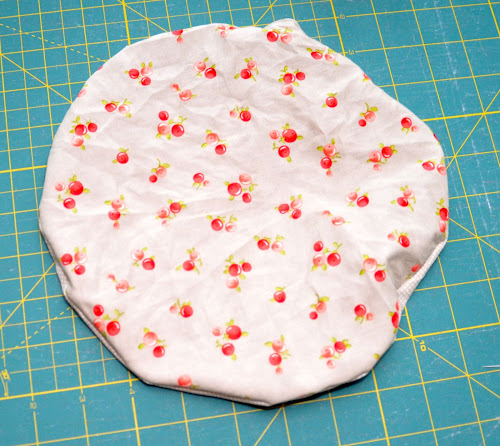
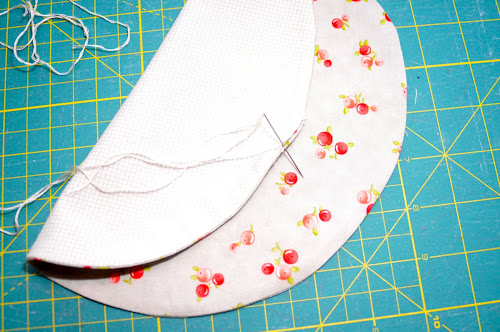
Open the square and trace a circle as per picture.

The mark is the line where you will cut. Sew within 1/4 inch from the marked line leaving a 2 inch opening to turn the circle inside out.

Then cut around the marked line.

Turn inside out.
With an invisible stitch close the opening.
Iron circle well.

Find the centre of the circle again.

Open the circle and fold one side 1 1/2 inches in as per picture.
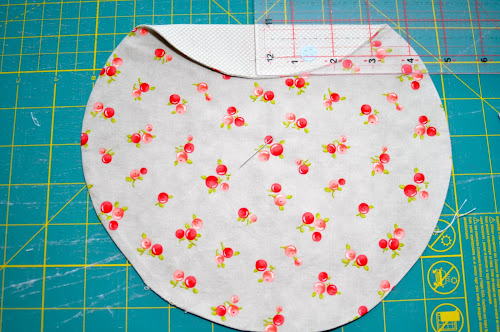
Do the same for all four sides and pin in place.

Then do another fold in the opposite direction making a square shape as per picture below.

Now find the point where both folds join (see picture) and make a stitch.

Do the same for all 4 corners.

Now find the middle point between two corners and make a stitch.
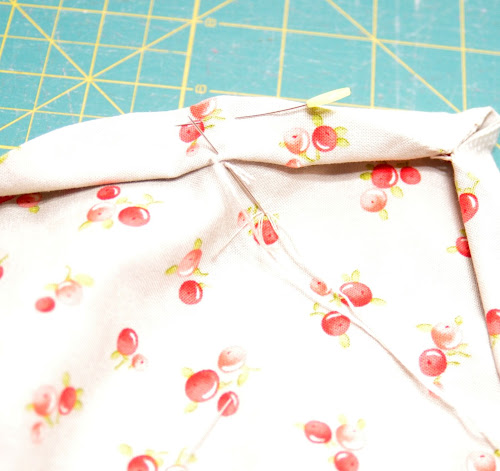
Do the same on all sides.

Now look at the corner. Pick up both sides of the fabric and fold out as per picture. It may be a bit tricky to do as the opening is small. Fold out the sides, insert your finger in the opening to give it some shape and pull at the corner towards the outside to mould the fabric into the shape. Do this several times to get the fold right.

Do this for all four corners.

Turn square around. The pin that identifies the centre point should still be there.
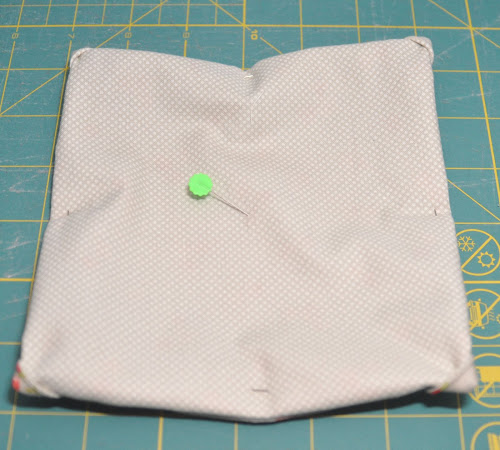
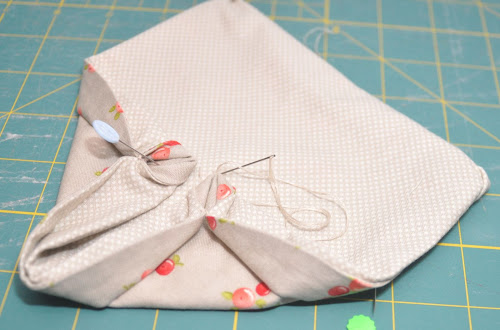
Now bring one corner to meet the centre and pin.

Now make a stitch in the corner.
Do the same for all corners.
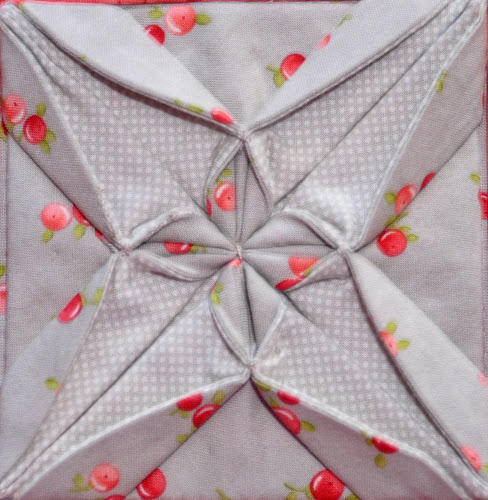
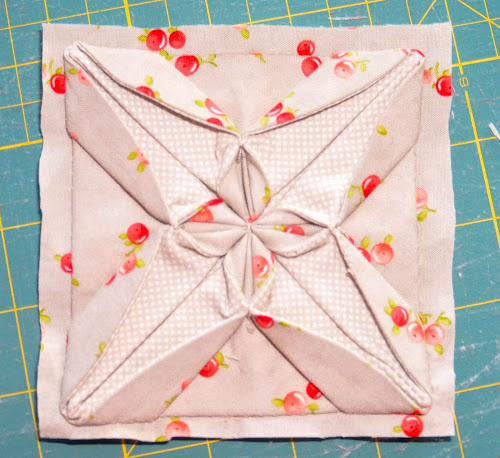
This is what it should look like when you have stitched all corners in the centre.
The square is a bit bulky because it has not been ironed.

You can press the block on the outer corners a bit to flatten it.
The square is about 4 1/2 inches. We’ll be sewing it to a 5 inch square.
Cut a 5 1/2 inch square and appliqué the origami piece to it.

Now we are ready to trim the square.

Trim square to 5 inches.
Cut the border pieces.

Add border to origami centre, iron seams and you’re done.

Textured blocks tutorials
This is the 24th block in a series of 25 exploring texture in fabric.
Each block is made out of a centre 5 inch square featuring some fabric texture such as pin tucks, smocking, shirring and the like. Then a 3 1/2 wide border encloses each centre square.
The colour scheme is red and white/cream alternating reds and white/cream for the centre square and border.
Some of the textures show better on plain colours than on heavily patterned fabric.
See all Textured quilt sampler tutorials for this quilt.
Share your pictures
Are you making this quilt? Share your pictures on Flickr’s TeresaDownUnder group.


Perfeito, adorei…..ótima explicação!!
LikeLike
that is an amazing piece of work. There is quite a bit of work but boy is it worth.
thanks for sharing
LikeLike
beautiful….excellent tutorial!
On 17 November 2012 17:10, Sewn Up by TeresaDownUnder wrote:
> ** > TeresaDownUnder posted: ” Closeup Block type: log cabin Block size: 11 > inches Colour scheme: reds and neutrals Texture/fabric manipulation: fabric > folding / fabric origami Quilt size: The finished quilt is 52 1/2 x 52 1/2. > Needs: two 10 in “
LikeLike
Tout simplement magnifique .merci pour ces explications
LikeLike
Thank you. I can’t wait to try this!
LikeLike
Amazing your work!!!
LikeLike
I can’t wait to try this, thank you. May try a whole lap quilt with this one pattern. Amazing work, Teresa
LikeLike
Thank you so much for your tutorial. The step by step way with pictures added makes it clear to me.
LikeLike