

Block type: log cabin
Block size: 11 inches
Colour scheme: reds and neutrals
Texture/fabric manipulation: fabric folding / fabric origami
Quilt size: The finished quilt is 52 1/2 x 52 1/2.
Needs:
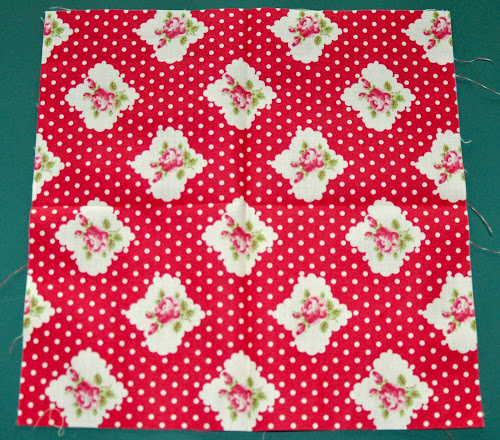
- a 10 1/2 inch square in red tones for the centre square.
- two 5 in x 3 1/2 in rectangles and two 11 in x 3 1/2 in rectangles for the border
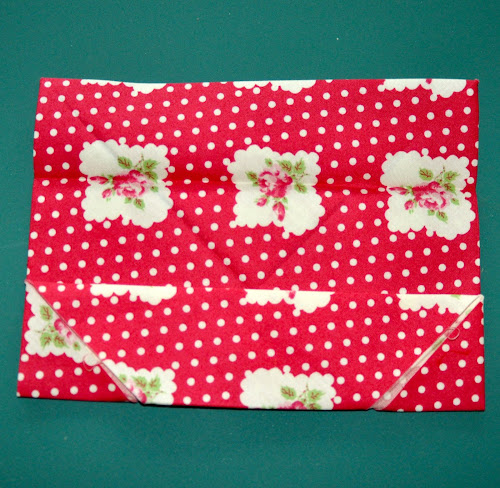
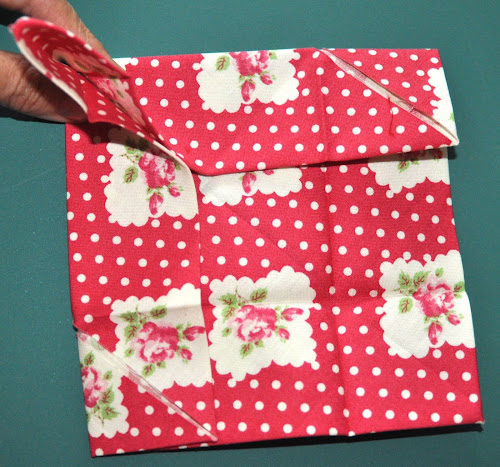
Turn piece around and fold in all 4 corners as per picture. Press well but do not press over the previous creases.
This is what your piece will look like.
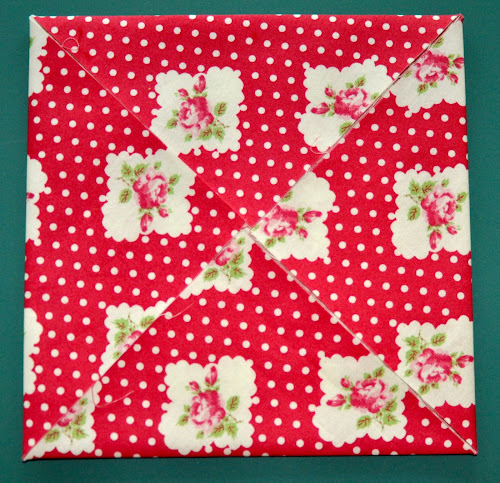
Turn it around. You still can see the creases from the first folds you made.

Now you need to make two folds that will meet in the center.
This is the first fold. Press keeping the previous creases.
Now fold the other side to meet in the middle. Press again keeping the previous creases.

Now unfold the last two folds. We’re nearly there folding and pressing.

Now fold both sides of the square to meet in the middle, just like you did before, but this time do it with the other two sides of the square.

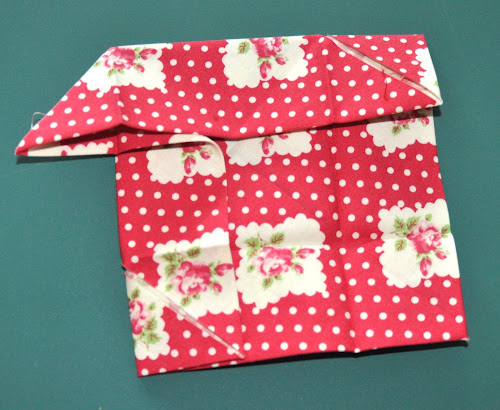
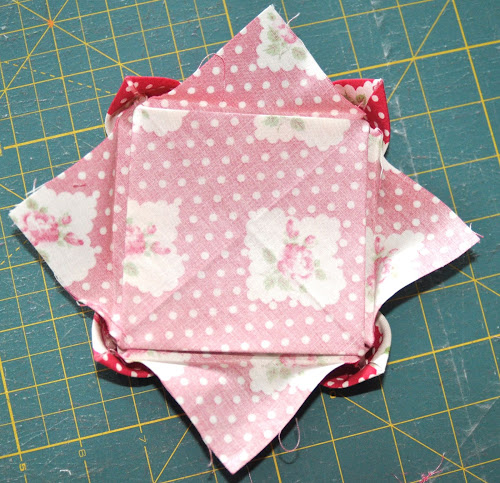
We have finished folding and pressing. You can see now that with all that folding we have 2 lines crossing on the diagonal plus two more lines making a small square.

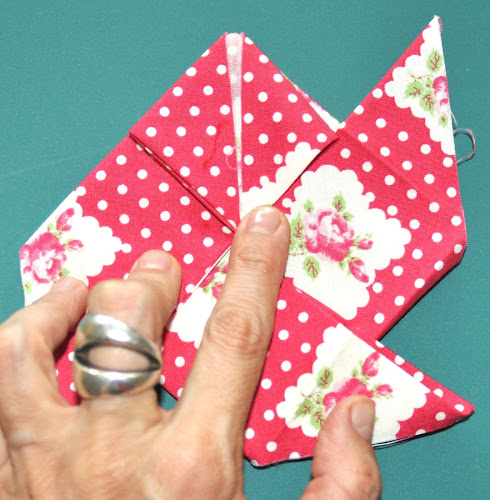
Now fold along the pressed lines as per picture making a sort of ear.
Fold the “ear” to the side.
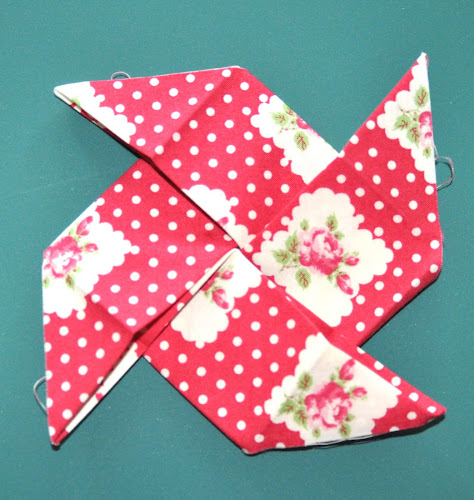
Do this in every corner always folding to the same side.

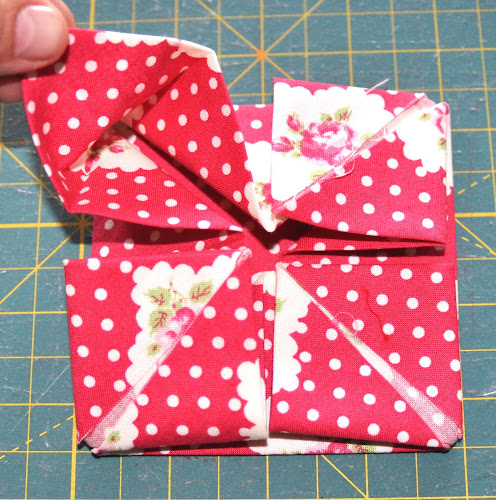
You will get a windmill like in the photo below.
Now pick up one of the corners and lift it up like in the photo below.
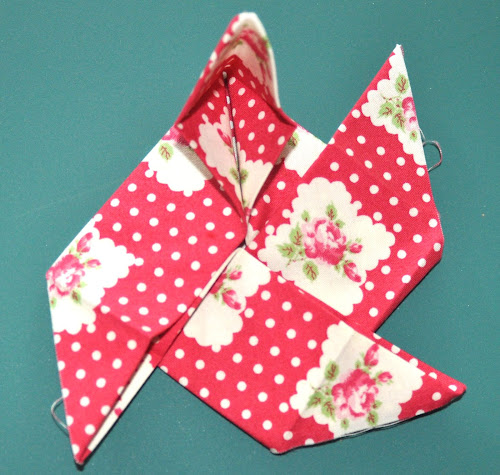
Then push it open to the middle as per photo.
Do the same with all corners.

Time to open each petal.
Pick up every corner and push it towards the back as per picture.
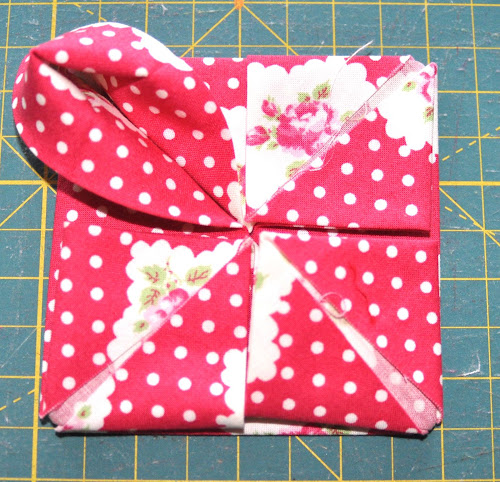
Do this with all 4 corners.

Turn the flower.
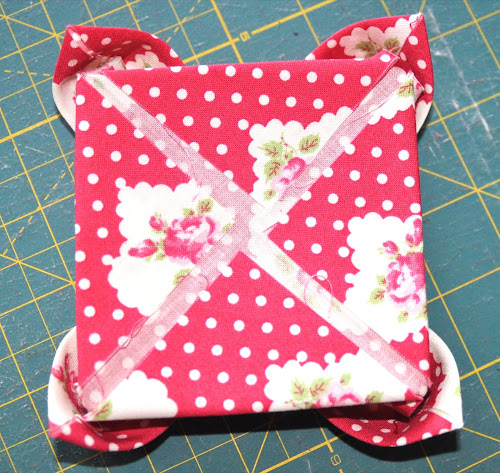
Open the folded triangles like in the picture.
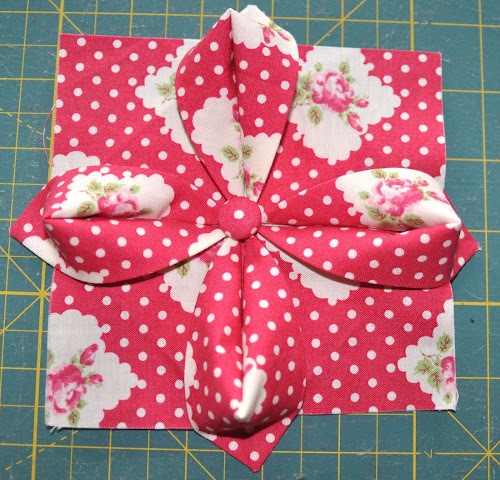
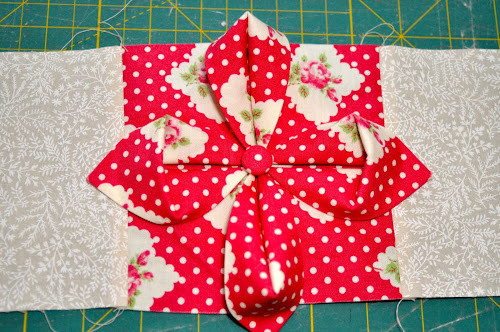
The flower is nearly done.

To hold the petals together, make a few stitches in the middle.
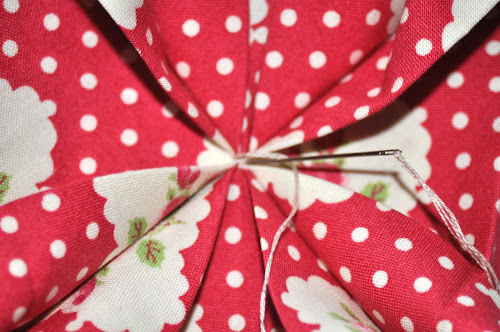
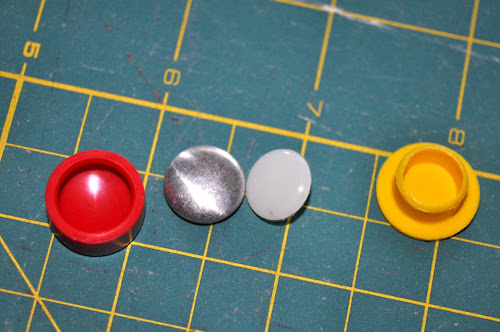
Cover a button with fabric or use a regular button.
Sew the button in the middle.
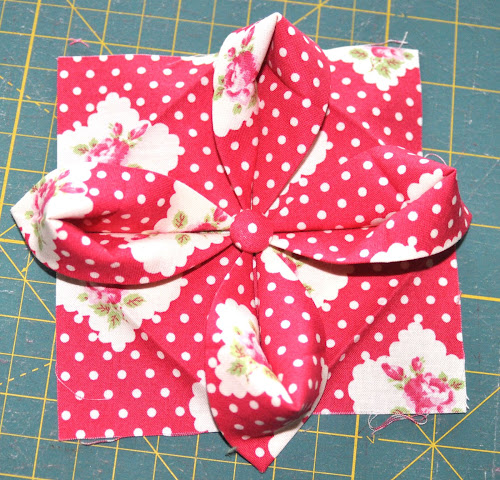
Press the folds in the corners of the square.
Now cut two 5 in x 3 1/2 in rectangles and two 11 in x 3 1/2 in rectangles for the border.
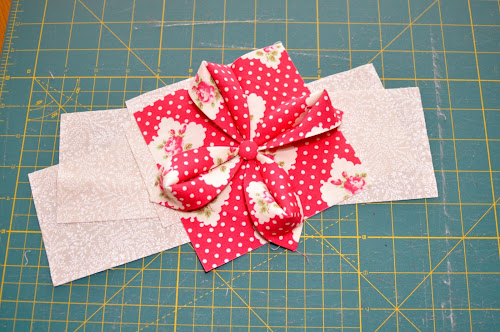
To attach the border, lift the petal and fold it forward.
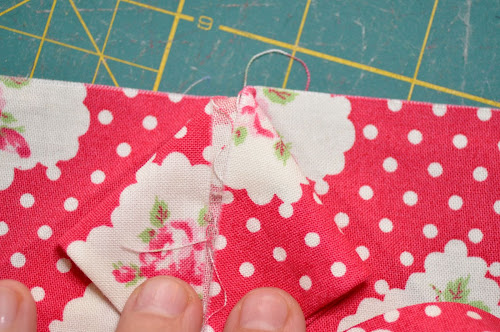
Pin the border.
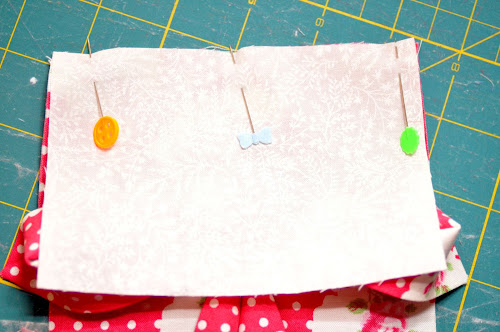
Stitch using a 1/4 inch allowance.
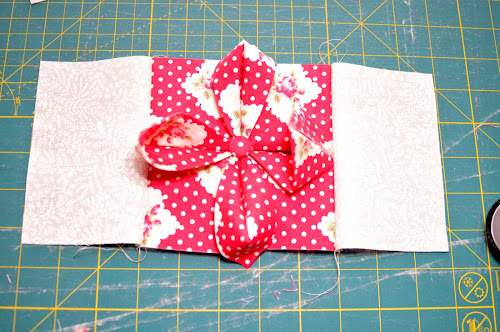
Iron seams to one side.
Do the same for the other two sides of the border.

Iron seams and you’re done.

Textured blocks tutorials
This is the 20th block in a series of 25 exploring texture in fabric.
Each block is made out of a centre 5 inch square featuring some fabric texture such as pin tucks, smocking, shirring and the like. Then a 3 1/2 wide border encloses each centre square.
The colour scheme is red and white/cream alternating reds and white/cream for the centre square and border.
Some of the textures show better on plain colours than on heavily patterned fabric.
See all Textured quilt sampler tutorials for this quilt.
Share your pictures
Are you making this quilt? Share your pictures on Flickr’s TeresaDownUnder group.

What you can do is so amazing. Just beautiful. I really like your Blogg
LikeLike
WOW!! LOVE THIS ! Thanks so much for your always helpful tutorials and these incredibly stunning blocks your creating.
Cheers, from Oshawa, Ontario. Canada
LikeLike
Thank you for your feedback!
LikeLike
that is so beautiful can’t wait to try it,thankyou
LikeLike
I just checked out a fabic folding book from the library and after paging through that and seeing your tutorial today I must say I understand better with your tutorial.Thank-you for sharing
LikeLike
Omg I love this. You have inspired me.
LikeLike
I love this. So original and beautiful.
LikeLike
Love this flower, the colors and the unique design. Not sure how I would use it, but am keeping the information so I can refer to it again. Wonderful idea.
LikeLike
This looked intimidating so I’ve been putting off trying it. I have done a lot of paper origami but finally made a fabric one. It’s beautiful. You’re tutorial was very easy to follow. Not sure if I’ll do the other 24 but I sure would like to
LikeLike
Hi Sandra, I´m glad you followed the tutorial easily. Pick a few of the other ones, your favourite ones. None of the textures is difficult, the origami flower is as hard as it gets.
LikeLike
I love the origami flower but the instructions won’t print out, boohoo!
LikeLiked by 1 person
I intend to make a video of this tutorial. Stay tuned.
LikeLike
Gracias. Buenísimo
LikeLike