

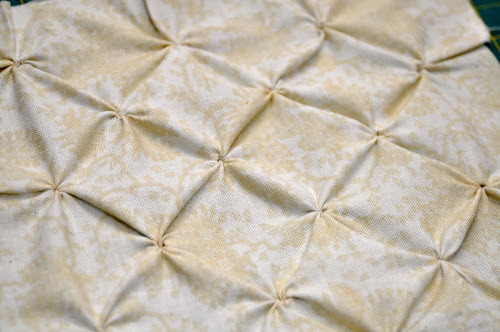
Closeup
This block requires hand sewing.
Block type: log cabin
Block size: 11 inches
Colour scheme: reds and neutrals
Texture/fabric manipulation: star gathering
Quilt size: The finished quilt is 52 ½ x 52 ½.
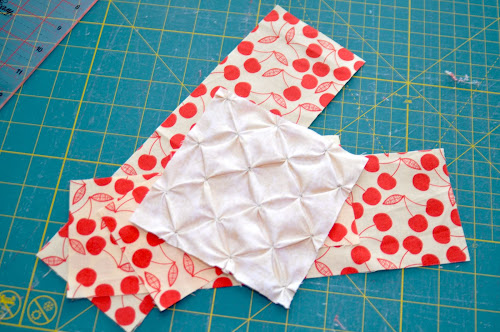
Needs:
- one 7 in x 7 in square in white
- two 5 in x 3 ½ in rectangles and two 11 in x 3 ½ in rectangles for the border
- matching stranded cotton
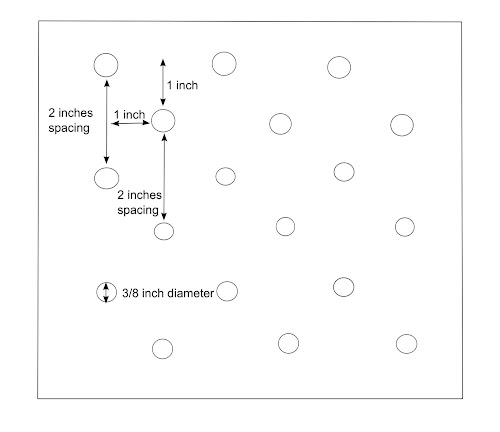
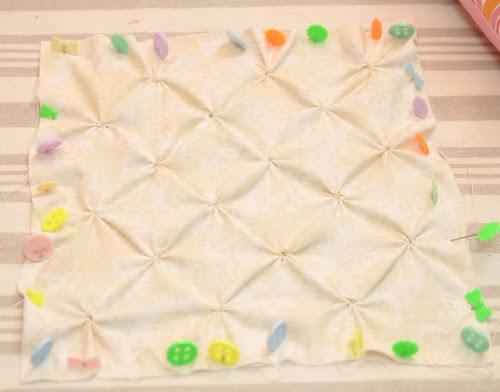
You will notice I drew double circles. This is so because I started with 1/4 inch circles and they turned out too small so I drew them larger.
Now, following the circle lines start stitching with a running stitch. When you reach the starting knot, pull the thread very tight to make a very small puff and then secure the thread by making two more stitches on top of the last one and cut the thread.
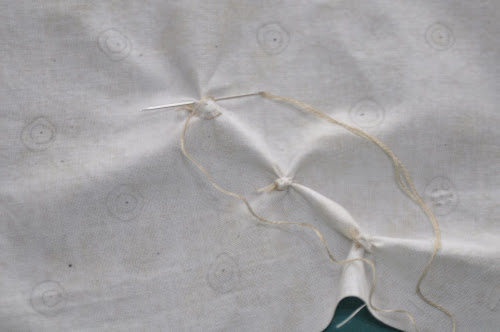
I stitched all the puffs on the diagonal though it doesn’t matter how you stitch your puffs.

This is the reverse side of the square.

This is the right side.
Stretch the square on to some padded board or iron table and pin. Then use the iron to steam the square really well without pressing. This is enough to flatten the piece and preserve the nice gathering.
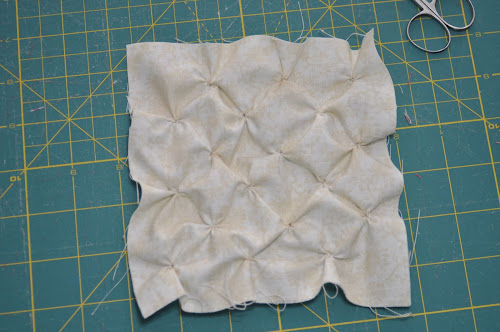
This is what the square looks like after steaming.
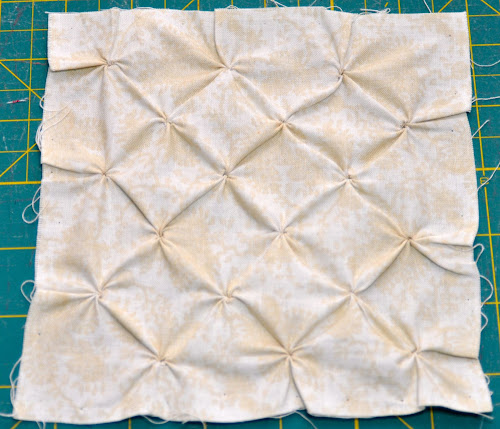
The texture is quite subtle because the circles are only 3/8.
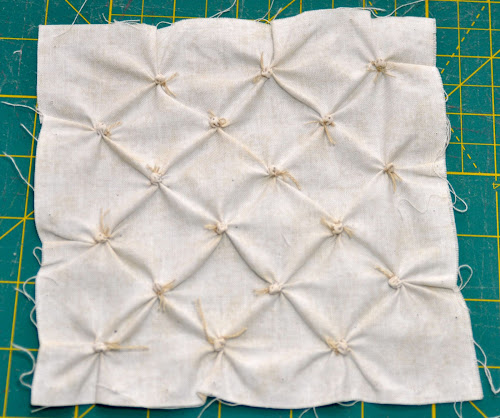
And the back.
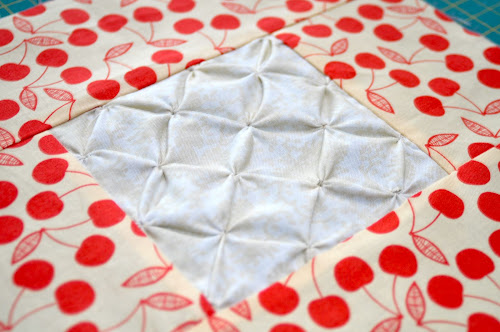
Now let’s trim the square to 5 inches. Mark the back of the square to 5 inches.
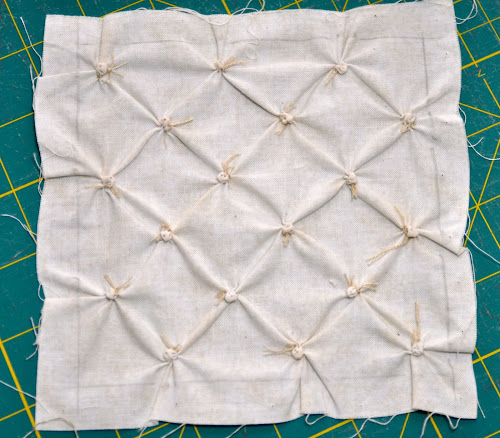
Trim.

Cut two 5 in x 3 ½ in rectangles and two 11 in x 3 ½ in rectangles for the border.
Attach the border and you’re done.
Textured blocks tutorials
This is the 11th block in a series of 25 exploring texture in fabric.
Each block is made out of a centre 5 inch square featuring some fabric texture such as pin tucks, smocking, shirring and the like. Then a 3 1/2 wide border encloses each centre square.
The colour scheme is red and white/cream alternating reds and white/cream for the centre square and border.
Some of the textures show better on plain colours than on heavily patterned fabric.
See all Textured quilt sampler tutorials for this quilt.
Share your pictures
Are you making this quilt? Share your pictures on Flickr’s TeresaDownUnder group.

Your tutorial is wonderful! Pretty block.
LikeLike
I love reading your blog, particularly your textured quilt blocks, and I have nominated you for the Versatile Blogger Award.
Find more details here: http://handmadebyclairebear.com/2012/08/19/versatile-blogger-award/
Regards,
ClaireBear
LikeLike
Aha! this is perfect for cushion number 5 in my collection. Thank you once again.
LikeLike
I love this texture and would love to do a king size quilt in it. I have a bolt of 120″ muslin that I think would look beautiful done in this, but I have a question. Do you know what the average loss of the overall size is when doing the texture at the spacing you’ve described? I wanted to do the top as a solid piece, but I’m trying to figure how much of a border I’ll have to add. Going from a 7″ block to a 5″ block would mean a 30% loss in size, but I’m not sure how much you have cut off to square up the piece, so it’s most likely less if I do a solid top. I hope I’m making sense here. Thank you in advance for any help!
LikeLike
Hi Amanda, I love this texture too. Your idea sounds great. The quilt will be very elegant.
To answer your question, I don’t know exactly how much fabric I trimmed off but I did take a picture the fabric I trimmed around the edges and it would be between 3/8 and 1/2 inch on each side, don’t you think? To be sure you could test on a small square.
LikeLike
Teresa, I was estimating about the same from the photograph. From what I can tell, I’ll lose 25-30% with the texture. I’m going to do what you suggested and do a couple test squares at different sizes to see if the percentage is the same for both. Thanks for responding!
LikeLike
I did a couple of test pieces – my approximate loss of dimension was 12%.
LikeLike
It was worthwhile doing the test. How do you plan to do your quilt?
LikeLike
I’m going to *attempt* to do a natural muslin whole cloth top with this texture, border it in a something different, use whole cloth muslin for the backer, as well, and then muslin for the binding. (I got a bolt of 120″ muslin at a realllly good price, so I want to do something subtle and elegant with it.)
I’m thinking I’ll tie the quilt at each of the puffs (through them, and with a natural cotton yarn) and clip the ends so it’s tidy. I don’t want to detract from the texture by doing a traditional quilting over the top.
I’ve got a beautiful oak leaf stencil I’ll probably use to do the border, though. And JoAnn’s has a really pretty fabric with a leaf scroll design in gold over cream that I think would look beautiful.
If I can’t manage the whole cloth top, I’ll probably do nine blocks with thin sashing of a gold color. Again, I don’t want to detract from the texture by putting a pattern too close to it. I want it to be the main focus of the quilt.
BTW – Teresa – I ❤ your blog. Thank you for it!!
LikeLike
Thanks! I and good luck. It’ll be a very elegant quilt, I’m sure about that.
LikeLike
Reblogged this on Kevin Allard Blog.
LikeLike
Would you pls give a little bit more information regarding block 11 star gathering? Do I just take one stitch at each circle and then tie it or do I need to take several stitches like an “x” at each circle?
Thank you, this quilt is so beautiful!
LikeLiked by 1 person
Hi Kay, I did take several stitches around the circle but an x should be enough to gather the fabric in a knot.
LikeLike