


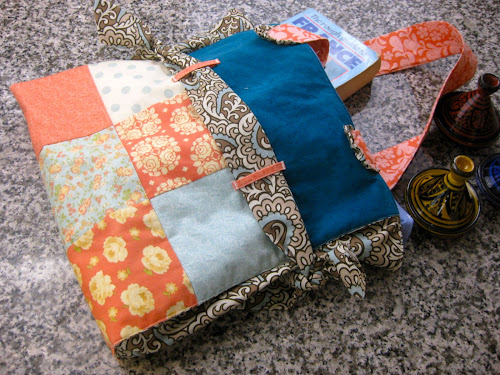
This bag was designed to accommodate quite a few items on the way back from the library.
Materials
- 12 charm squares or 5 inch squares (6 for each side of the bag)
- Scrap fabric for the top of the bag
- Scrap fabric for lace, sides and handle embellishments
- Scrap fabric for handles
- Lining fabric
- Medium weight one sided fusible interfacing
- Batting
Instructions
Body of bag
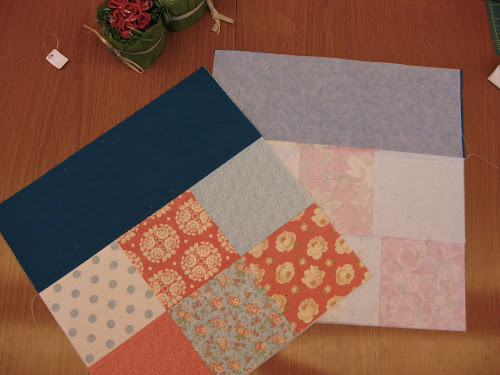
Place the charm squares on 2 rows per panel.

Sew both panels as per picture below. You will end up with 2 rectangles measuring 9 1/2 x 14 inches each.

Cut a rectangle for the top of the bag measuring 14 x 5 1/2 inches.

The side panels measure about 14 1/2 x 14 inches after stitching.

Cut a piece of fusible interfacing 14 1/2 x 14 inches and fuse to the wrong side of the panel.
Expandable sides
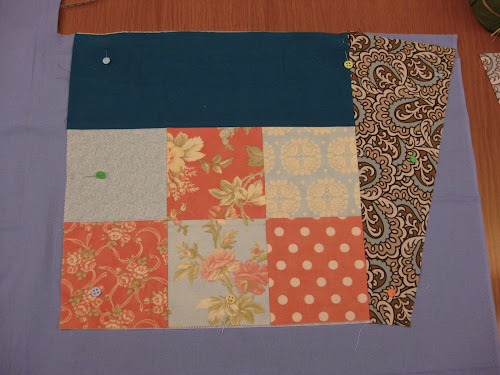
Cut 2 pieces of fabric with the following measurements:
- Top: 6 inches
- Base: 2 inches
- Side: 14 1/2 inches
The resulting shape is an isosceles trapezoid with the top 2 inches wide and the bottom 6 inches wide.
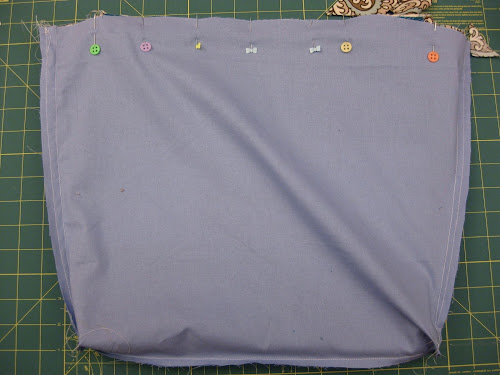
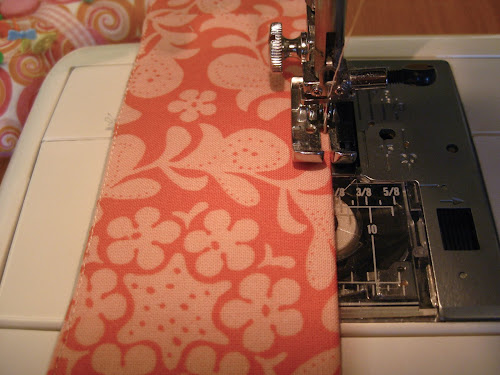
Pin and stitch each piece to one of the panels as per picture below. Then iron flat.

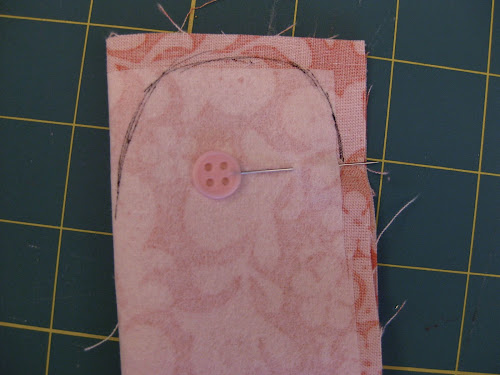
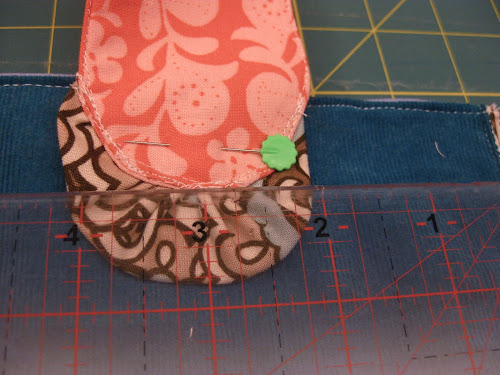
Tabs
Cut one 5 inch charm square in 4 strips like below.

Fold in half and iron, then fold each side in and iron again.

Top stitch each strip, make a tube with it and pin to the bag.

Centre the tabs as per picture.

Stitch to the bag at the top and bottom of the tab. Do 3 passes with the machine using a tight zigzag stitch.

Batting
Batting will only be added to the side panels.
Cut 2 14 x 14 1/2 inches rectangles and pin to the side panels.

Stitch along the seams of the charm squares to secure the batting.

Trim off excess batting when finished.

Stitch along the expandable sides seam as well.


Now place both sides of the bag right sides together and stitch along the sides.

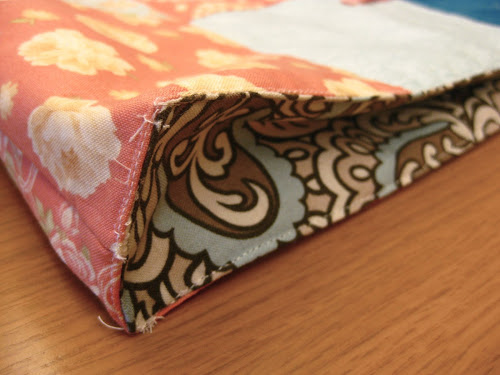
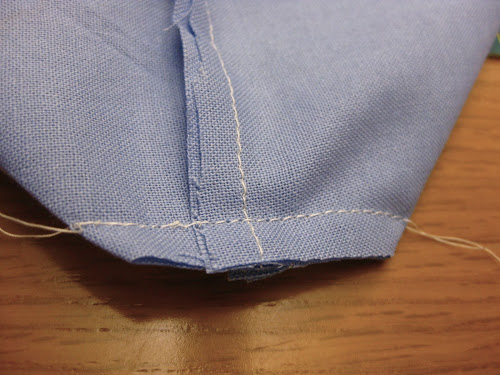
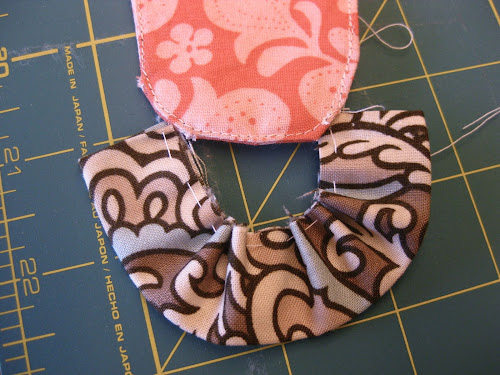
Then fold the bag as per picture and stitch along the bottom.

When finished, fold the bag as per picture and stitch about one inch in the batting as per picture.

Cut the corner off.

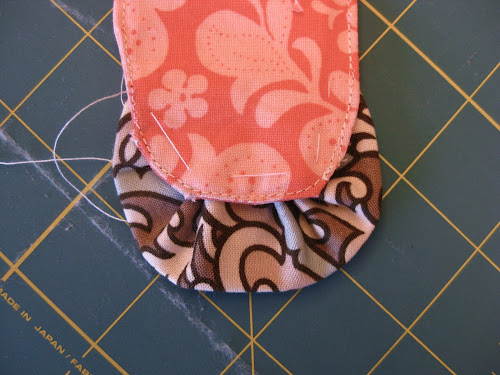
For a better crisper finish, top stitch along the seams where the expandable side and the side panels meet.

This is what the expandable panel looks like after topstitching.
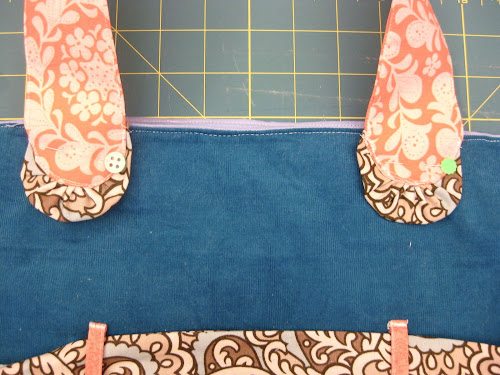
Lace/belt
The finished size of each belt is 2 in x 29 in.
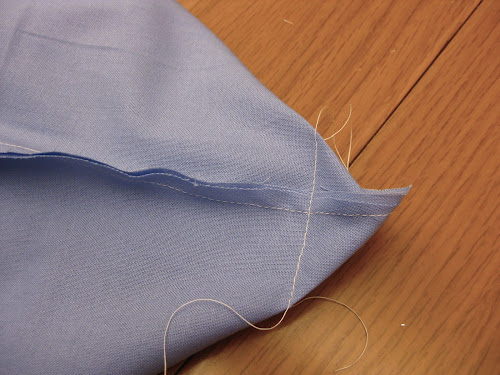
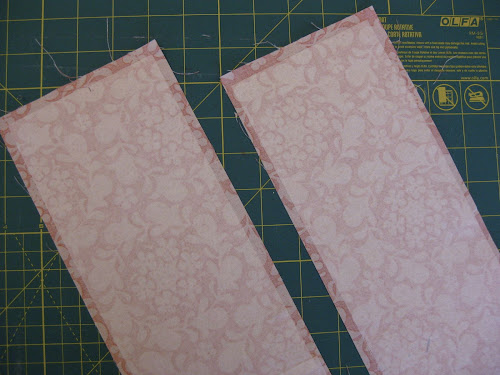
Cut 2 strips of fabric measuring 4 1/2 x 30 inches. Fold in half and stitch around leaving a 1/4 seam allowance. Leave a 2 to 3 inch opening on the side to turn belt inside out. Stitch the endings at an angle as per picture.

Turn belt inside out after stitching and close the opening. Iron flat.
Put the belt through the tabs as per picture.

Tie the sides.

Lining
Use each side of the bag to cut the lining. Place the sides on the lining fabric and cut.
Then sew both sides together leaving an opening at the bottom of the lining to turn bag inside out. For the lining leave 1/2 inch allowance instead so that the lining is slightly smaller than the bag.

To make the corners do as you did with the bag earlier. Stitch along the corner.
Trim off.
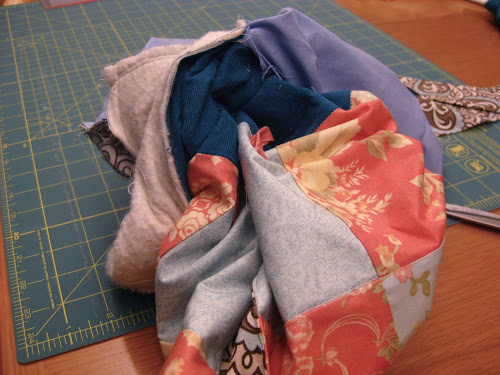
Place the lining over the outside bag as in the photo and pin.
Stitch along the top of the bag. The opening at the bottom of the lining is where we will be turning the bag around.

Turn bag inside out.
Top stick along the top of the bag.

Close the lining opening.

We are now ready to add the handles.

Handles
Cut 2 strips of fabric measuring 5 in x 22 1/2 in.
Cut 2 strips of interfacing measuring 4 1/2 in x 22 in.
Iron the interfacing to the wrong side of the fabric.
Fold strip in half as per picture and draw a half circle.
Stitch around the circle and the rest of the strip leaving a 1/4 inch seam allowance. Leave a 2 to 3 inch opening to turn handle inside out.
When turned, iron flat.

Top stitch for a crisper finish.
The handles are ready. They are quite wide because the bag is designed to carry a bit of weight.

Handle embellishment
Cut a rectangle 5 1/2 in x 1 3/4 in. Fold in half, then fold sides in and iron.

Using a needle, stitch at regular intervals making a frill as per picture.

Pull from both sides of the thread to obtain the desired length.
Pin to the end of each handle.

Baste in place.
Topstitch to secure frill to handle.
Then place the handle 2 inches in from the side of the bag.
Align the top of the bag with the end of the round part of the the handle as per picture below.
Sew handles in place.
The handle is sewn on the edge of the handles and then 1/4 inch in as well for strength.

The bag is finished.
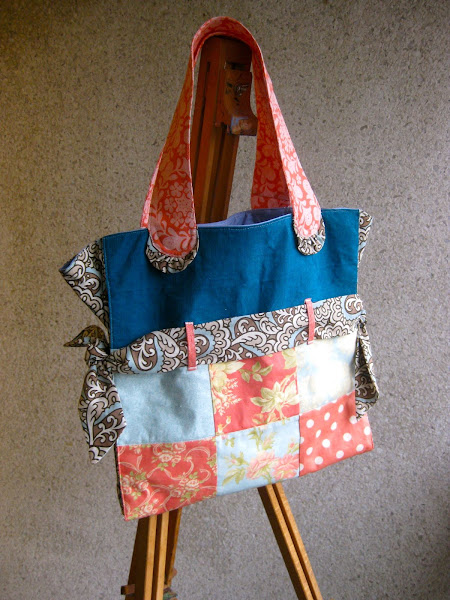
Detail of bag
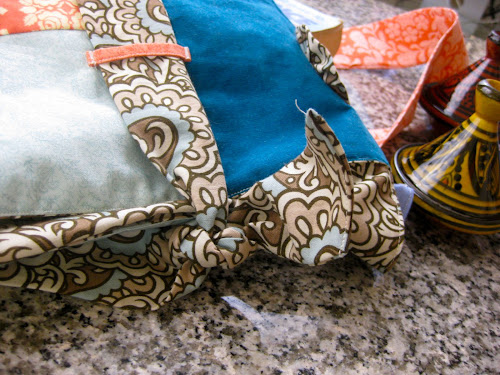
The bag is very roomy. The size can be adjusted by loosening or tightening the belts.
If you make this bag, please upload a photo to my Flickr group or Instagram and tag me with @teresadownunder.
www.flickr.com
|

Precioso!!! muchas gracias
LikeLike
What a super idea. I also love the choice of fabric colours too. Great idea Teresa.
LikeLike
Love it!
LikeLike
Wow this is wondeful.
LikeLike
awesome, love it !!!!
LikeLike
Not only is it expandable, I see so many more ideas in this project. Especially like the handles. found you on Totally Tutorials
LikeLike
Very Cute! Easy to follow tute….. May an old lady who cheats at quilting give a suggestion? I love my zipper foot for top stitching if give me a finished edge that is easy to follow. I will visit your site for more. Again, thank you, from Montana………….
LikeLike
FANTASTIC idea and tutotial! I was just complaining about needing an expandable bag to use few things on walk with dog, but also big for shopping or library or even a few overnight needs when I visit relatives a couple hours drive away. So I am happy as a spring Robin! 🙂
And I don’t have a way to use a video tut your tut is like a still video and a written/pic tut. Very easy to understand as well! WELL DONE!!
LikeLike
Great tip Lori. I do have trouble topstitching corners as you can see on the photos! I’ll try a zipper foot next time.
LikeLike
Fantastic idea! Your instructions are incredible……..I’m not an avid sewer….have some sewing skills but I think I could do this………..thanks for the GREAT instructions!
LikeLike
This is a great easy to follow tutorial.Thank-you very much for sharing it; first bag I’ve made start to finish really thank-you so much
LikeLike
Thanks! You can share your pics at http://www.flickr.com/groups/1933379@N22/pool/
LikeLike
I’m not sure if I’m just dense (which is most likely the case) or if my computer is not showing all the steps. But, I am a little bit lost with the sides. Can you dumb it down for me?
LikeLike
You need to cut the sides with the given measurements. Then attach each side to each patchwork panel. If you’re more precised I may be able to help you better.
LikeLike
I’m a bit confused too (dense, too) regarding the side panels – are the expandable inserts on each side of the bag or do they join together when the bag is sewn together, making only one side expand? Hope you can help, thanks!
LikeLike
Karon, you attach both panels to each side and then stitch the bottom making a big bag. Then trim each corner to square the bottom.
LikeLike
Thanks for your prompt response, Teresa. I do love your bags!
LikeLike
I have actually been looking for something that would expand and thought I’d just have to do a trial and error attempt but now I don’t have to! Your tut is awesomely fantastic! And the bag is beautiful to boot! Thanks so much for all your effort!
LikeLike
OMG! I just noticed I had actually commented last year! I must explain…I feel a bit embarrassed.
Less than a month after I wrote, my mother died so I wasn’t up for sewing. Then my phone quit working which is where I had your site bookmark. Thus I had completely forgotten about your fab bag until I saw it on favequilts. I’ll be making it soon so I don’t forget again. 🙂
LikeLike
No worries Pkae. I love feedback!
LikeLike
Very cute. I love the idea of expandable as I don’t like tiny purses, but have a tendency to carry too much junk in my purse. I’m trying to design my own personalized to my needs so I appreciate any new feature I can incorporate. Your ideas are very inspiring. Thanks for sharing.
LikeLike
are the tabs really 5 inches long each? the picture looks like they are shorter, and the sash is only 2 inches wide so I am confused
LikeLike
Judy, that’s because you need to fold in the tabs somthe ends are hidden. Then you need to allow for enough space for the belt to move through with ease.
LikeLike
thank you for your quick response. Bag is finished and I love it. Made it from scraps from a quilt I made for my grand daughter. Now she also has a bag to carry her music books in.
LikeLike
My only concern with this adorable bag (and very well-done tutorial) is the placement of the handles. I think I am going to cut my handles about 4 inches longer so that they can be moved down to take a bit more of the weight off of the very top of the bag. I tend to overload everything I carry. I also love the ruffle at the end of the handle. Very, very nice.
LikeLike
Beautiful!!!
LikeLike
Is there a print friendly version. 35 pages is a lot of printing and the computer is not at the sewing area.
LikeLike
Sorry GW, I don’t have a print friendly version of the tutorial.
LikeLike
Sorry to go back to the sides, but they are the only part of this tutorial that are unclear….do you cut the sides in a “v” – ie the two inch bottom is centered under the 6 inch top – or do you cut a lop sided triangle shape with one perpendicular edge? Otherwise a very good tut!
LikeLike
Hi Kay, yes, you cut the sides in a sort of V with the two inches centred, yes. The shape is more like an isosceles trapezoid not a triangle but that´s the idea. I´ll see if I can rephrase that in the tutorial.
LikeLike
Love this. Have a niece who soon will be going back to school for masters. I know she will enjoy something like this. Thanks
ecarp
LikeLike
hi- just having my slept-in-going-to-relax-long-weekend ‘morning coffee’…and spotted your tutorial – I love the expanding panel idea! – very well-done.
I have been making a few bags and use batting and quilt them-but have not been using any interfacing- does this make a big difference in the bag? does the iron-on interfacing stick ok over the seam allowances? I’ve only used it for sewing where I iron it on before sewing pieces together-your approach looks like it would be less bulky…….
thanks for any feedback if you have time
LikeLike
I’ve made bags with and without interfacing. When using batting I sometimes add some medium weight fusible interfacing to make the bag a bit sturdier though I find the difference is not huge with the medium type so you can skip that step. The medium weight interfacing doesn’t add bulk to the seams. Sometimes I cut the interfacing smaller than the fabric piece if I don’t want the extra bulk though in most cases I don’t think it matters.
LikeLike
thanks for your reply…… I’m going to try some interfacing in the next bag I make to see how it goes.
I’ve just finished making some little zippered bags…..and was at a show last month where they did a demo putting in a zippered pocket in a tote bag……so I’m also going to try my hand at that…..they made it look really easy, so we’ll see…..reminded me a little of how bound buttonholes are made-was very clever.
LikeLiked by 1 person
I found you on Craftsy a couple of days ago. I have now subscribed to your you tube channel and now your website. I think that must tell you how much I enjoyed your crafts. Thanks for making everything so easy to understand. Cath
LikeLiked by 1 person
Thank you Catherine
LikeLike
I am having a problem with the instructions. They say to completely make the outside of the bag – and then – once the outside is done it says to use the outside panel to cut the lining. Since the bag is all put together already, you cannot use it as a pattern. Also, I am confused about the expanadable section. Does it expand on both sides or just one side? Thanks
LikeLiked by 1 person
The problem is the order of the tutorial sections. As you can see in the photo, the lin8ng is cut before stitching the bag together. But if you have already done that it doesn’t really ,matter. The lining size is the same as the outer plus the seam allowance. You can flatten the finished bag on a folded piece of fabric and use the shape to cut it.
LikeLike