
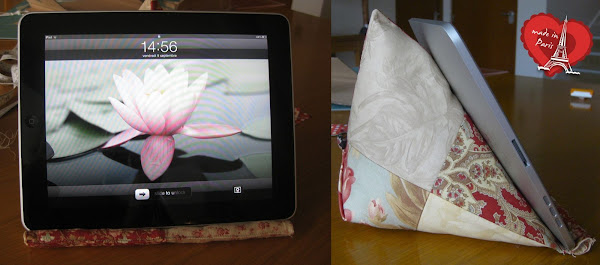
This iPad stand can also be made in plain fabric.
Video: How to make an iPad stand
Or you can make it with the leg of a pair of jeans:
Materials
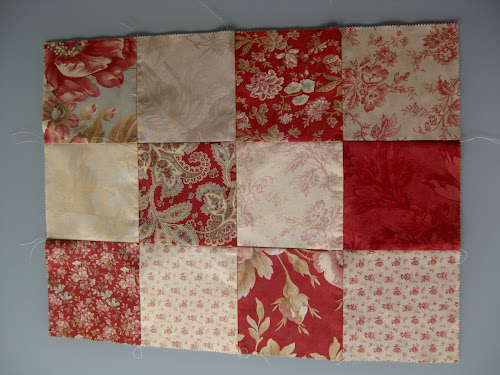
- 12 charm squares (5 inch charm squares)
- 1 self covered button
- a stone or something heavy for the inside
- a piece of cardboard
- polyfill
Print iPad beanbag cardboard base (optional) -it may need adjustments depending on how you like your ipad beanbag to sit.
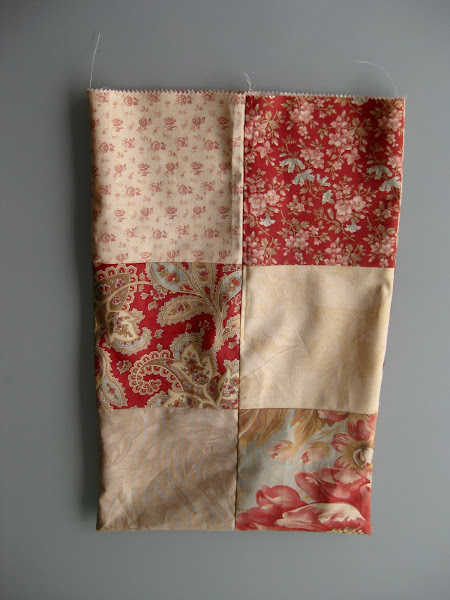
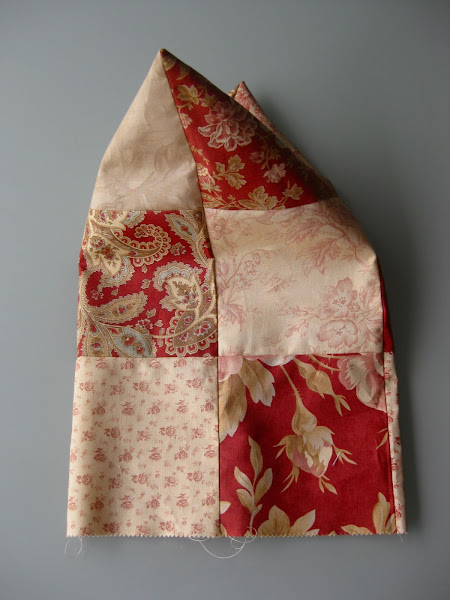
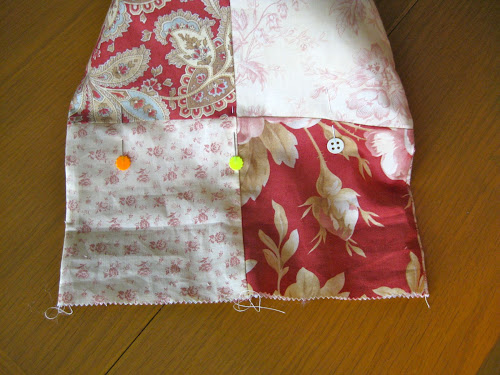
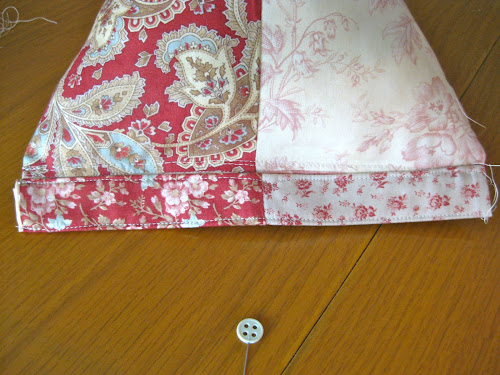
Assemble the charm squares as in the photo to make a rectangle.
Fold in half, right side facing together, and pin.
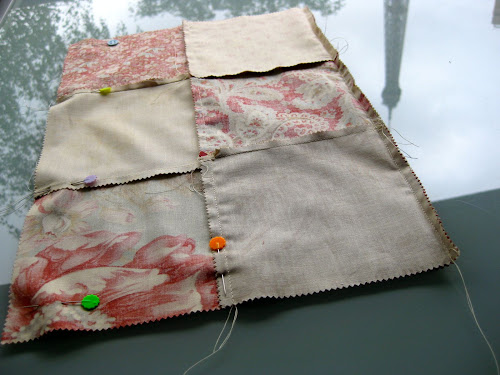
Sew around 2 sides to make make a sac.
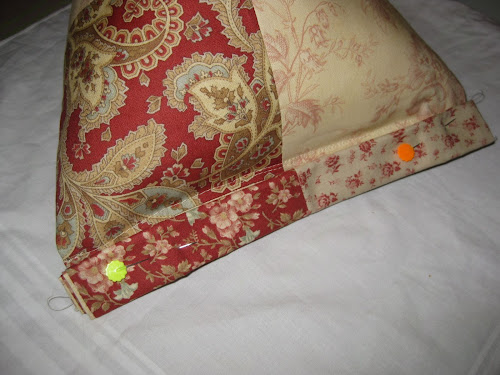
Place the sac as per photo with both points placed in the middle.
Pick up the bottom point and pin up with the point reaching the middle seam as per photo.
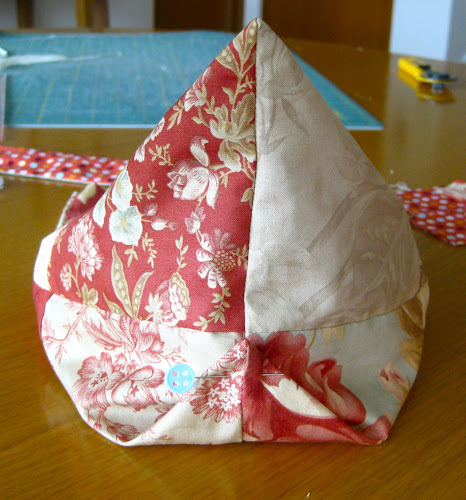
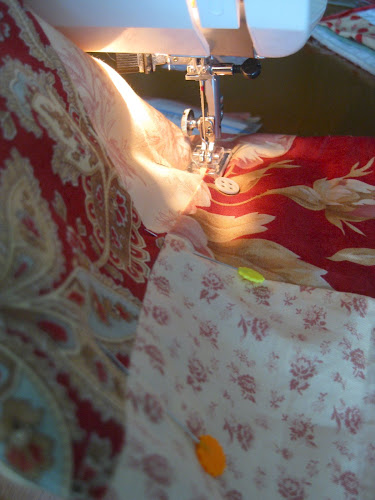
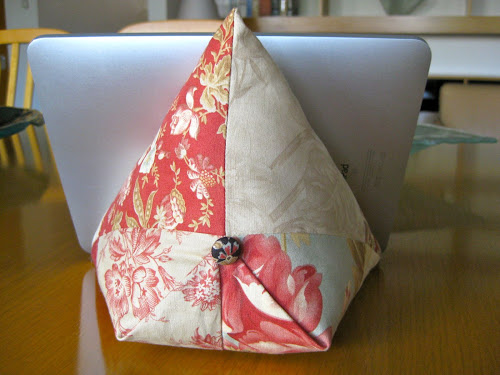
Sew a button in place as per photo below.
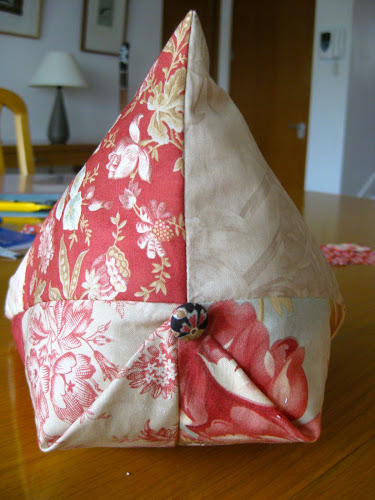
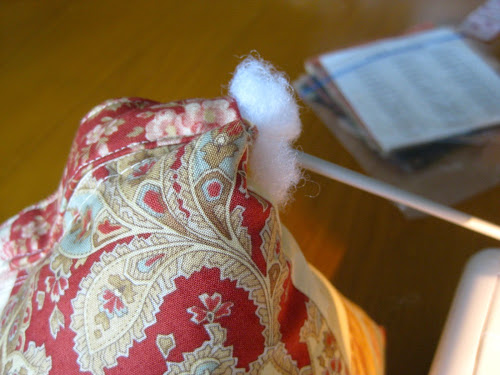
Start filling the beanbag using polyfill. Cut a piece of carboard 4 ½ x 4 ½. Place the cardboard inside at the base of the beanbag and the weight on top. Fill around it.
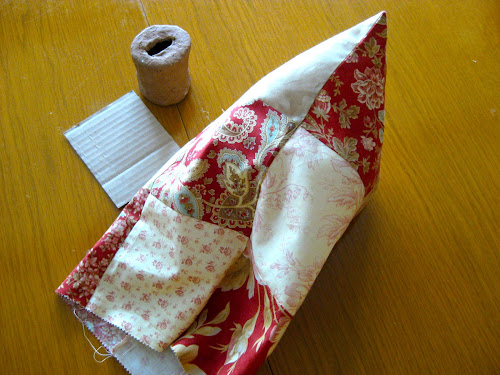
Fill in the beanbag and pin both sides together on the last charm square seam as per photo.
Stitch along the seam leaving a small opening 2 inches wide on one side to top up the filling before closing it completely.
Fold the left over piece into 4 folds.
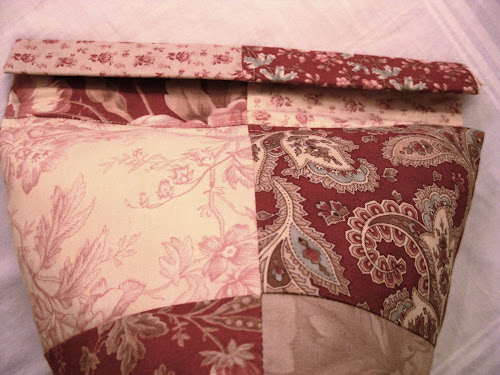
Pin it.
Stitch both sides of the tube.
Fill the thin tube with polyfill and then sew the tube closed.
Sit the iPad or e-book reader on it.


Love this idea! Now if only I can get an iPad for Christmas…..
LikeLike
That is so clever! I’m thinking about an adaption for my TomTom on the car dash since I broke the stand for it..hmmmmm. Thanks for the inspiration!
LikeLike
You have a very good idea! It´s practical and cute too!
LikeLike
This is a great idea!!! Thankyou for sharing.
LikeLike
Hi, I have found charm squares come in different sizes. What size were yours? Thanks again for sharing this tutorial. Jessica
LikeLike
Jessica, I used 5inch charm squares.
LikeLike
LOVE it! I am headed for my sewing room to make one for myself!
LikeLike
Adorable!
Two ideas that might help with getting stability in the car:
1) Use sand as the filler. It has weight and repositions itself to sort of mould around surfaces. You can bake it to sterilize if you wish, it lasts forever, and bugs won’t try to eat it.
2) add side pockets that would hang down from the bottom to “hug” the car console. I can’t really see how much space you do or don’t have in there, but it might be just enough counter balance prevent slide.
Or perhaps a couple of vinyl patches on the bottom (or some of that fancy duck tape for grip, if you could bring yourself to put tape on such a lovely creation).
LikeLike
Gad
Thank you for the ideas! They are good but I think only using duck tape would work combined with something to hold the beanbag to the armrest too. The main problem is that the iPad is too heavy so with movement it comes off even if the beanbag stays in place. That’s why I came up with a different solution https://mypatchwork.wordpress.com/2011/09/24/ipad-holder-for-the-car/ and this idea does work. I still use the beanbag for watching movies in bed or for reading recipes in the kitchen, though for the kitchen it would be better if the beanbag was made of vinyl or something you could easily wash.
Anyway, it was a really good learning exercise.
LikeLike
Teresa…….here’s what I thought about…(I love yours!)
I never use sand. It can have moisture in it and I’ve never been happy using it in pin cushions especially. It DULLS your pins and when your pins are stuck in the cushion over time get sticky and don’t “slide” easy into fabrics when pinning……I know this isn’t a pin cushion but just saying…
I find that crushed walnut shells is awesome….ur can get it at pet stores. It sharpens the points on straight pins and is one of my favorite things to use for project that call for something like sand.
You can use plastic canvas if you dont have cardboard.
All charms are five inches. someone posted hey found charms in different sizes, which is impossible. There are names for the different sizes……like layer cakes are 10 inches. But ALL CHARMS are 5 inches, you are correct.
Of you wanted to use a print and not charms (save a step on sewing blocks together for this you would cut your piece 20-3/4 x 15-1/2…I did the math, assuming you sewed with 1/4 inch seams.
As far as oilcloth…..you can’t pin,that stuff without leaving holes….what about PUL fabric that’s used for diaper covers…….
I CAN’T WAIT TO MAKE ONE!!!!! Thanks for this tutorial!
LikeLike
Thanks for the suggestions.
LikeLike
Thank you for this tutorial and your idea! It is just this what I need!
Greetings from Germany, Bavaria,
Suserl
LikeLike
i made this today. for some reason my fire wouldn’t stay on, so i added a couple straps. thanks for the pattern!
LikeLike
Shannon, maybe your reader is lighter than the iPad. Or the beanbag wedge is not big enogh. I’m glad you found a solution though.
LikeLike
Your idea is great but use poly pellets made by the people who make poly fill. This what is in the expensive wedges. Thank you Jane
LikeLike
a great idea, thanks for sharing
LikeLike
I wanted to leave another comment…i had to modify it for my kindle fire, but it works PERFECTLY for my kindle fire 8.9. again thank you
LikeLike
Thank you for the feedback again Shannon
LikeLike
I see that I’m a bit late to the party, but wow! What a great idea! Get that pattern on Etsy, Teresa – you’re a wonder!
LikeLike
Love the idea. Certainly better than what I’ve seen so far. Any idea what the measurements would be for a iPhone / itouch would be?
LikeLike
Hi, well no measurements for an iPhone, sorry but you should be able to work it out quite easily.
LikeLike
Thanks for sharing–great tutorial! For those wanting to make a similar stand for an iPhone, here’s a tutorial to check out: http://factotum-of-arts.com/2013/11/30/tutorial-iphoneipad-stand/. Both projects are definitely on my future gifts list!
LikeLike
I have an I-pad mini which I was lucky enough to receive for Christmas, I am going to adapt the size and add pockets to hold my stylus and some earphones. Thanks for the tutorial, a great idea and looking forward to making it.
LikeLike
What is the cardboard and the stone for , and do you leave them in or take them out?.
LikeLike
The stone is to make it heavier so it sits better and the cardboard to make the bottom flatter. You leave them in. You can use other materials to achieve the same results if you prefer.
LikeLike
Could this be used for a book stand, my mother has the use of only one arm after a stroke, and she finds it difficult to hold books. Some better visual instructions would make it easier. But thanks for the many photos.
LikeLike
To add to my earlier post. Have used your instructions and made one immediately, at 2am. I couldn’t wait till daylight. Up to the filling stage now, might try both poly fill and bean bag beans, I don’t want it too heavy as she is 83 and not very strong. Although I would like a little weight in it. Thanks for the idea. I will be making more for some of the other residents now.
LikeLike
LOL. 2 am is probably a bit late though it is an easy enough project to do even at that time!
LikeLike
And yes, it´ll work for a book best if you leave a gap between the sausage and the rest of the stand so that thick books fit better.
LikeLike
Thanks for the reply. My grandson has taken it for his tablet. Yes I did leave a gap for a book. so now to make another one. I used bean bag beans, worked well but a little difficult to sew the closure shut. I used a little sausage made from Fibre fill rolled and bound with cotton thread and stitched it into the bit you folded over with the zipper foot to get as close as I could. Once I have one I like I’ll give it to Mum and work on some for others in the home. Thanks again It’s great.
LikeLike
Is there any way to print just the instructions? I would love to make a few of these for my friends and family. Great job!!!
LikeLike
Thanks Bev, Sorry three’s no printable of this tutorial.
LikeLike
I just wanted to say thanks very much for this tutorial, I just made a smaller version of this for my satnav, you can see it here: https://mypatchwork.wordpress.com/2011/09/17/ipad-e-book-reader-beanbag/
LikeLike
Posted the wrong link & I can’t delete my previous comment. My satnav beanbag is here: https://fuchsiacrafts.wordpress.com/2016/06/03/not-a-card-2/
LikeLiked by 1 person
Hi Helen, thank you for showing me your beanbag. It looks great. And thank you for linking back to my tutorial.
LikeLike
Hello, I like sewing and try to recycle as much as I can. For the the tablet stand base could using a styrofoam tray work well enough? I haven’t made one yet but was thinking up ideas for the base instead of use cardboard.
What do you think?
Cheers
LikeLike
For the base anything that’s stiff enough would work I’d say 😊
LikeLike
I made one the other day,and it came out quite well.I used crushed walnut shells in mine as that is what i had on hand,you could also use the pellets for dolls.I’ll be making these for gifts this year for the grands,and great grands.Thanks for the tutorial.
Thanks you so much for this,oh and it looks cute sitting there holding your ipad/kindle or book.Best part is i’m also a cross stitcher and i use it to hold my pattern that i have on a magnetic board,the board sits in the channel and doesn’t slide off the arm of my chair like everything else did..
LikeLiked by 1 person
Pattern holder! What a great idea! 👍
LikeLike
Forgot to say ,i didn’t use the cardboard,and it works fine..
LikeLiked by 1 person
I would not stand-up it is falling down what is wrong ?
LikeLiked by 1 person
I’d have to see a photo of it.
LikeLike